1.1. Submit spam, non-spam, and phishing scam messages to Microsoft for analysis
Submit junk or phishing messages that passed through the spam filters
If you receive a message that passed through the spam filters that and should be classified as junk or a phishing scam, you can submit the "false negative" message to the Microsoft Spam Analysis and Microsoft Phishing Analysis teams, as appropriate. The analysts will review the message and add it to the service-wide filters if it meets the classification criteria.
You can submit junk email messages in the following ways:
Using Outlook Web Access to mark the messages as junk
Review the following articles for marking messages within the OWA console:
Use email to submit junk (spam) or phishing scam messages to Microsoft
To submit a junk or phishing scam message to Microsoft:
Create a blank email message.
Address the message to the Microsoft team that reviews messages, as follows:
For junk messages: junk@office365.microsoft.com
For phishing scam messages: phish@office365.microsoft.com
Copy and paste the junk or phishing scam message into the new message as an attachment.
Note
You can attach multiple messages to the new message. Make sure that
all the messages are the same type — either phishing scam messages or
junk email messages. > Leave the body of the new message empty.
Click Send.
2. Sharepoint
2.1. Sync SharePoint files and folders (Windows)
Sync
the files in your Microsoft 365 or Microsoft SharePoint site libraries
so they’re always available on your computer, even when you’re offline.
Turn on Files On-Demand in OneDrive
In the Windows notification area, select the blue OneDrive cloud icon.
Note: If
you’re on Windows 10, your computer already has the OneDrive desktop
app on it, but you'll need to turn on Files On-Demand in OneDrive
settings.
Select Help & Settings > Settings.
Select Settings > Save space and download files as you use them.
Set up Sync for your library
In your browser, on your SharePoint site, navigate to the library of files you want to sync with.
Select Sync in the toolbar.
Note: If your browser asks for permission to use OneDrive, confirm that it's OK.
Sign in to OneDrive to start syncing your files and finish OneDrive setup.
Work with your files in your file system
Once synced, your SharePoint files appear
in File Explorer under the name of your organization (or in Mac Finder,
if you're using a Mac).
Each location will appear in a separate subfolder.
Copy or move files from your computer to SharePoint right from your file system.
To check the status of your files, add an
account, or manage other sync settings, select the blue OneDrive cloud
icon in the Windows notification area.
Work with files in Files On-Demand
After Files On-Demand is turned on, you’ll see new status
icons next to each of your SharePoint files. You can copy or move files
from your computer to SharePoint right from your file system.
Save space on your device by making files online-only.
These files are only available when you're connected to the Internet, but don't take up space on your computer.
When you open an online-only file, it downloads to your device and becomes locally available.
You can open a locally available file at anytime even without Internet access.
To make a file always available, even when you're offline:
Right-click it and select Always keep on this device.
To change a file back to an online-only file:
Right-click it and select Free up space.
2.2. Sync SharePoint files and folders (Mac)
Sync the files in your Microsoft 365 or
Microsoft SharePoint site libraries so they’re always available on your
computer, even when you’re offline.
Turn on Files On-Demand in OneDrive
On the right-hand side of the menu bar at
the top, select the OneDrive cloud icon. (You may have more than one
cloud icon. Select each in turn and read the title bar of the pop-up
window that appears to find the icon that represents your work
files—rather than your personal files.)
Select Help & Settings > Preferences.
Under Files on Demand, ensure that this feature is turned on. If the button there says Turn Off Files On-Demand, then it's already turned on.
Set up Sync for your library
In your browser, on your SharePoint site, navigate to the library of files you want to sync with.
Select Sync in the toolbar.
Note: If your browser asks for permission to use OneDrive, confirm that it's OK.
Sign in to OneDrive to start syncing your files and finish OneDrive setup.
Work with your files in your file system
Once synced, your SharePoint files appear in Mac Finder under the name of your organization.
Each SharePoint library that you've sync'd with appears in a separate subfolder in Finder.
Copy or move files from your computer to SharePoint right from your file system.
To check the status of your files, add an
account, or manage other sync settings, select the OneDrive cloud icon
in the Windows notification area.
After Files On-Demand is turned on, you’ll see new status
icons next to each of your SharePoint files. You can copy or move files
from your computer to SharePoint right from your file system.
Save space on your device by making files online-only.
These files are only available when you're connected to the Internet, but don't take up space on your computer.
When you open an online-only file, it downloads to your device and becomes locally available.
You can open a locally available file at anytime even without Internet access.
To make a file always available, even when you're offline:
Right-click it and select Always keep on this device.
To change a file back to an online-only file:
Right-click it and select Free up space.
3. Outlook on the web
3.1. Setting up an Out of Office message
This topic shows you how to use the Automatic Replies tab. Use automatic replies whenever you want to let people who send you email know that you won't be responding to their messages right away. After automatic replies are turned on, they'll be sent once to each sender.
Set up an automatic reply
To turn on or modify automatic replies, do the following:
At the top of the page, select Outlook (or Mail). Or, select the App launcher, and then select Outlook.
At the top of the page, select Settings > Automatic replies.
Note The setting is also located in the Outlook on the web options. At the top of the page, select Settings > Options. Expand Mail | Automatic replies.
Make the desired changes and click Save.
Use the following information to help you set up your automatic reply:
Setting
Description
Don't send automatic replies
Select this option to turn off automatic replies.
Send automatic replies
Select this option to turn on automatic replies.
Send replies only during this time period
Select this check box, and then enter a start time and end time to control when automatic replies are sent. If you don't set a time period, your automatic reply will remain on until you turn it off, and you'll be reminded you have automatic replies turned on each time you sign in to your mailbox.
Send a reply once to each sender inside my organization with the following message:
Use this box to create a message that will be sent only to senders who are inside your organization. This option may not be available.
Send automatic reply messages to senders outside my organization
Select this check box if you want automatic replies to be sent to senders outside your organization.
Send replies only to senders in my Contacts list
Select this to limit automatic replies to senders who are in your Contacts folder. Senders who aren't in your Contacts folder won't receive the automatic reply.
Send replies to all external senders
Select this to send your reply to all senders outside your organization.
Send a reply once to each sender outside my organization with the following message:
If you've selected Send replies to all external senders, enter the reply you want sent in this box.
3.2. Forward email from Office 365 to another email account
It's easy to set up forwarding so email sent to your Office 365 account automatically goes to another email account, such as your Gmail account.
If you keep a copy of forwarded messages, check your Office 365 account regularly to make sure you haven't exceeded your mailbox size limit. If the size limit is exceeded new messages may not be forwarded.
3.3. Use rules in Outlook Web App to automatically forward messages to another account
Forward or redirect your email messages by setting up Inbox rules in Outlook Web App.
You can use inbox rules to automatically forward or redirect messages sent to your mailbox to another account. This is useful if you won’t be checking your primary mailbox and want to be able to read and respond to messages from another account. To set up inbox rules, go to Settings > Options > Organize email or Settings > Options > Mail > Automatic processing.
How do I automatically redirect all messages to another account?
Redirected messages appear as though they came from the original sender. Use a redirect message rule when you want replies to redirected messages to go to the original sender.
In a web browser, sign in to Outlook Web App using the URL provided by the person who manages email for your organization. Enter your user name and password, and then click Sign in.
At the top of the page, choose Outlook. Or, choose the app launcher > Outlook.
At the top of the page, select Settings > Options, and then select one of the following:
Organize email > Inbox rules > New
OR
Mail > Automatic processing > Inbox rules > New > Create a new rule for arriving messages
Type a name for your rule.
Under When the message arrives, select Apply to all messages.
Under Do the following, select Forward, redirect, or send > Redirect the message to.
Enter the email address you want in the To box, or choose it from your list of contacts.
Choose OK to save your selections, and OK or Save to create the rule.
How do I automatically forward all messages to another account?
Forwarded messages appear as messages that are forwarded by you. Use a forward message rule when you want the replies to go to the address the messages are forwarded from, and not to the original sender.
At the top of the page in Outlook Web App, select Settings > Options, and then select one of the following:
Organize email > Inbox rules > New
OR
Mail > Automatic processing > Inbox rules > New > Create a new rule for arriving messages
Under When the message arrives, select Apply to all messages.
Select one of the following, depending on the settings you see:
Forward, redirect, or send > Forward the message to
OR
More options > Forward, redirect, or send > Forward the message to
Enter the email address you want in the To box, or choose it from your list of contacts.
Choose OK to save your selections, and OK or Save to create the rule.
What else do I need to know about redirect and forward rules?
A copy of messages that you redirect or forward remains in your mailbox. If you add an action to delete the message, the message goes to your Deleted Items folder and still is counted against your mailbox limit. If you exceed your mailbox limit, you may be blocked from sending or receiving new messages. Forwarding rules also may not work until you delete enough messages to bring the total below your mailbox limit.
When you create a forward or redirect rule, you can add more than one address to send to. The number of addresses you can send to may be limited depending on your account settings. If you create a rule with more than one address, test it to make sure it works.
If you don’t want a forward or redirect inbox rule to apply to all messages, choose any option other than Apply to all messages.
Your administrator may have blocked the ability to use forward or redirect rules to send mail to some or all domains outside of your own. After you’ve created a redirect or forward rule, test the rule by sending a message from a third account to your account. Then check the account your rule is set to redirect or to forward messages to.
3.4. Change password for my Office 365 account
This article is for Outlook Web App, which is used by organizations that manage email servers running Exchange Server. If you're using Office 365 or Exchange Server 2016, your email program is Outlook on the web.
How do I change my password?
In a web browser, sign in to Outlook Web App. Enter your user name and password, and then click Sign in.
Select Settings >Change password.
Follow the instructions on the Change password page.
Don't forget that once you've changed your password, your email client (such as Apple Mail or Microsoft Outlook, and your mobile phone) will need to be updated with your new password.
What else do I need to know?
If you also connect to your account from a phone or a tablet, you also need to update the password in the settings on that device to match your new password. Similarly, you also need to update the password in the settings of any other desktop email application you may be using (for example, Apple Mail or Mozilla Thunderbird).
To help make your password more secure, you can:
Use a minimum of eight characters (your account may require more or less).
Use a mix of capital and lowercase letters.
Use numbers as well as letters.
Use punctuation or other non-alphanumeric characters.
Most email accounts require a minimum number of characters or a minimum level of complexity for passwords. The requirements are set by your administrator. For information about the password requirements for your account, contact your helpdesk.
Depending on your mailbox settings, you may not be able change your password using the Options page. If you can't change your password using Options, contact your helpdesk.
3.5. Reset password for my Office 365 account (SSPR)
With the self-service password reset (SSPR), users can reset their passwords on their own when and where they need to. The SSPR can help you accomplish the following:
Self-service password change: The user knows their password but wants to change it to something new.
Self-service password reset: The user is unable to sign in and wants to reset their password by using one or more of the following validated authentication methods:
Send a text message to a validated mobile phone.
Make a phone call to a validated mobile or office phone.
Send an email to a validated secondary email account.
Answer their security questions.
Self-service account unlock: The user is unable to sign in with their password and has been locked out. The user wants to unlock their account without administrator intervention by using their authentication methods.
IMPORTANT: You must first register to use the SSPR service in order to use this feature. Please review the 'Register for self-service password reset' for instruction on how to do this (see related pages at the bottom of this article).
Reset the password for your Microsoft Office 365 account
Don't forget that once you've changed your password, your email client (such as Apple Mail or Microsoft Outlook, and your mobile phone) will need to be updated with your new password.
3.6. Register for self-service password reset
As an end user, you can reset your password or unlock your account by yourself using the self-service password reset (SSPR). Before you can use this functionality, you have to register your authentication methods or confirm the predefined authentication methods that your administrator has populated.
Enter your username and the password that your administrator provided.
One or more of the following options are available for you to configure and verify.
Office phone: Only your administrator can set this option.
Authentication Phone: Set this option to another phone number that you have access to. An example is a cell phone that can receive a text or a call.
Authentication Email: Set this option to an alternate email address that you can access without using the password you want to reset.
Security Questions: Your administrator has approved this list of questions for you to answer. You can't use the same question or answer more than once.
Provide and verify the information that your administrator requires. If more than one option is available, we suggest that you register multiple methods. This gives you flexibility when one of the methods isn't available. An example is when you're traveling and you're unable to access your office phone.
3.7. How to prevent real email from being marked as spam in Office 365 (for users)
Is your real email getting marked as spam in Office 365? Do this.
Exchange Online Protection (EOP) attempts to filter out spam, keeping your Inbox clear of content that users don't want to see. But sometimes, EOP filters out things that you do want to see.
To remove messages, highlight the message, select not junk > and then report to Microsoft.
3.8. Reporting SPAM
To mark messages as spam, highlight the message, select junk > and then report to Microsoft.
Report spam or messages that are genuine to Microsoft Report spam messages to Microsoft by using the Report message feature. Additionally, you can send a message to junk@office365.microsoft.com and attach one or more messages to report.
The Report Message add-in works with Outlook 2016 to allow you to report suspicious messages to Microsoft as well as manage how your Office 365 email account treats these messages.
Messages that your Office 365 email account marks as junk are automatically moved to your Junk Email folder. However, spammers and phishing attempts are continually evolving. If you receive a junk email in your inbox, you can use the Report Message add-in to send the message to Microsoft to help us improve our spam filters. If you find an email in your Junk Email folder that's not spam, you can use the Report Message add-in to mark it as a legitimate email, move the message to your Inbox, and report the false positive to help Microsoft improve our spam filters.
Report a message
If you choose the Report Message button on the ribbon, you'll see several different options.
Junk
Phishing
Not Junk
Options
Help
If you choose Junk, Phishing, or Not Junk, you'll have the option to send a copy of the message to Microsoft, along with your classification of the message. This is optional. To turn off the option to send a copy of the message to Microsoft, choose Options and then follow the steps listed under
Report Message add-in options below.
What's Junk email?
Junk email messages are typically referred to as spam. These are messages that you don't want to receive that may be advertising products you don't use or find offensive. If you choose the Junk option, a copy of the message may be sent to Microsoft to help update our spam filters, and the message will be moved from your Inbox to your Junk Email folder.
What's phishing?
Phishing is the practice of luring you into disclosing personal information, such as bank account numbers and passwords. Often phishing messages look legitimate, but have deceptive links that actually open fake websites. If you select Phishing, a copy of your message may be sent to Microsoft to help update our filters, and the message will be moved from your Inbox to your Junk Email folder.
What's a legitimate email?
If you know the sender and you're expecting the message, or if you receive a message that's mistakenly marked as junk, you can use the Report Message add-in to mark the message as Not Junk. This will move the message from the Junk Email folder back to your Inbox.
Report Message add-in options
Choosing Options from the Report Message button allows you to choose whether messages are automatically sent to Microsoft when they're reported as junk or phishing attempts.
Change your Report Message options
Choose Options from the Report Message button on the Ribbon.
Select one of the following options:
Always send a copy of the message to Microsoft
Never send a copy of the message to Microsoft
Ask before sending a copy of the message to Microsoft
Once you've made your selection, choose Save. You'll see the following message in the InfoBar in the message header confirming your changes were saved successfully.
Notes:
Options settings are cached with the message, so in order to see your updated setting, you'll need to select a new message first.
If you're using an Exchange server email account, your Exchange administrator may have chosen one of these settings for you. If so, you can't reset the option yourself.
If your version of Outlook doesn't support the Options setting, you'll see a notification message that directs you to https://aka.ms/ReportMessageOptions.
Remove the Report Message add-in
You can remove the Report Message add-in from the Outlook Add-ins store.
Choose the Store button on the Outlook ribbon.
Choose My add-ins.
Scroll to the Report Message add-in and either disable it or uninstall it.
3.9. Block or allow (junk email settings)
Use the Block or Allow settings to help control unwanted and unsolicited email messages by creating and managing lists of email addresses and domains that you trust and those that you don’t.
This article is for Outlook Web App, which is used by organizations that manage email servers running Exchange Server 2013 or 2010. If you're using Office 365 or Exchange Server 2016, your email program is Outlook on the web. For help with Outlook on the web, see Get help with Outlook on the web.
Manage your junk email
At the top of the screen, select Settings > Mail.
Under Options, select Block or allow.
Below are the block or allow settings for managing email addresses and domains:
Settings
Description
Don’t move email to my Junk Email folder
Select this option if you want to turn off junk email filtering. If you select this, you won’t be able to use any of the other options on this page.
Warning: If you select this option, email detected as spam by Exchange Online Protection will be delivered to your Inbox if the spam action set by your administrator is to move these messages to the Junk Email folder.
Automatically filter junk email
Select this option if you want to use junk email filtering. This filter is in addition to the junk email filter that’s been set by your administrator.
Safe Senders and Recipients
Safe senders and recipients are domains and people whose email you don’t want diverted to your Junk Email folder. Add senders you trust and recipients that you don't want to block to this list. For more details, see Safe senders and recipients.
Trust email from my contacts
If you select this check box, email from any address in your contacts folders will be treated as safe. For more details, see Safe senders and recipients.
Blocked Senders
Blocked senders are domains and people you don't want to receive email messages from. Messages received from any email address or domain in your blocked senders list are sent directly to your Junk Email folder. For more details, see Blocked senders.
Don’t trust email unless it comes from someone in my Safe Senders and Recipients list or local senders
In addition to Safe Senders and Recipients and Blocked Senders, you can use this setting to treat all email as junk unless it comes from someone included in your Safe Senders and Recipients list. For more details, see Blocked senders.
Safe senders and recipients
Safe senders are people and domains you always want to receive email messages from. Safe recipients are recipients that you don't want to block, usually groups that you’re a member of. Messages received from any email address or domain in your safe senders and recipients list are never sent to your Junk Email folder.
IMPORTANT: The server that hosts your mailbox may have junk email filtering settings that block messages before they reach your mailbox.
To add an entry to Safe senders and recipients, enter the email address or domain that you want to mark as safe in the Enter a sender or domain here text box, and then press Enter or select the Addicon next to the text box.
For example, to mark all email from addresses that end in contoso.com as safe, enter contoso.com in the text box.
To mark a specific person as safe, enter that person's full email address. For example, to mark all messages from KatieJ@contoso.com as safe, enter KatieJ@contoso.com in the text box.
(Optional) Select the Trust email from my contacts check box to treat email from any address in your contacts folders as safe.
To change an entry in Safe senders and recipients, select the entry and select Edit .
Make any changes you want, and select Save to save your changes.
Blocked senders
Blocked senders are people and domains you don't want to receive email messages from. Messages received from any email address or domain listed in your blocked senders list are sent directly to your Junk Email folder.
To add an entry to Blocked senders, enter the email address or domain that you want to block in the Enter a sender or domain here box, and then press Enter or select the Add icon next to the text box.
For example, to block all email from addresses that end in contoso.com, enter contoso.com in the box.
To block a specific person, enter that person's full email address. For example, to block all messages from KatieJ@contoso.com, enter KatieJ@contoso.com in the box.
(Optional) Select the Don’t trust email unless it comes from someone in my Safe Senders and Recipients list or local senders check box to treat all email as junk unless it comes from someone included in your Safe Senders and Recipients list or local senders.
To change an entry in Blocked senders, select the entry and select Edit.
Make any changes you want, and select Save to save your change.
3.10. Add another person’s mailbox to your folder list in Outlook Web App
If you have been provided access to another persons mailbox, the person’s mailbox for which you have been provided access to will display in your Outlook Web App folder list every time you open Outlook Web App.
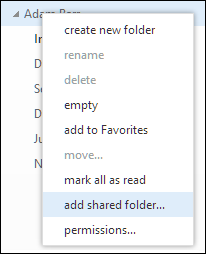
Log in to your mailbox using Outlook Web App.
Right-click your name in the folder list, and click Add shared folder.
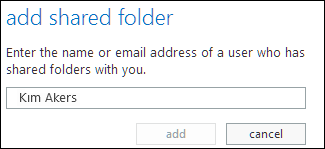
In the Add shared folder dialog box, type the name of the mailbox that you have been provided access, and click Add.
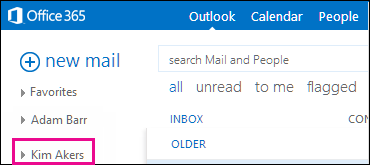
The mailbox appears in your Outlook Web App folder list.
If you have only been provided access to specific folders in the other user’s mailbox, you will only see the folders for which you have been granted access.
If you decide that you no longer want to see the other person’s mailbox every time you open Outlook Web App, right-click the folder, and click Remove shared folder.
4. Apple Mail (Mac)
4.1. Import or export mailboxes in Mail on Mac
Import or export mailboxes in Mail on Mac
Mail can import email messages that have been exported in mbox format from other email apps, and import mailboxes exported from Mail on a Mac. You can export mailboxes in mbox format.
Import mailboxes
In the Mail app on your Mac, choose File > Import Mailboxes.
Select a source in the list, read the information that appears below the list, then click Continue.
If
you’re importing a mailbox exported from Mail or a folder in the
~/Library/Mail/ folder on another Mac, select Apple Mail. To get to the
Mail folder on a Mac, click the desktop to make sure you’re in the
Finder, press and hold the Option key, choose Go > Library, then
select the Mail folder.
If you’re importing messages from
a Windows or UNIX computer, select “Files in mbox format”, then locate
the folder containing the files.
Reorganise the imported messages, if you like.
The messages are in a new mailbox called Import in the Mail sidebar. You can drag folders and messages from the Import mailbox to new or existing mailboxes, then delete the Import mailbox.
Choose a folder or create a new folder, then click Choose.
Mail
exports the mailboxes as .mbox packages. If you previously exported a
mailbox, Mail doesn’t overwrite the existing .mbox file; it creates a
new .mbox file, such as My Mailbox 3.mbox.
4.2. Temporarily Disable an Account from Mac Mail App
Temporarily Disable an Account from Mac Mail App
In the Mail app on your Mac, choose Mail → Accounts.
Select the account, then deselect the Mail tick-box. Now the account’s messages will not be shown in Mail.
You can easily get the messages back by once again selecting the Mail tick-box.
This method is useful when you want to temporarily stop using your
email account on Mac. But if you want to completely remove your account
and all its messages from your Mac then a different approach is needed.
4.3. Setting up exchange email: for Apple Mail
Here's how to set up your email using the Apple Mail app, on your Mac desktop.
Open Apple Mail.
Your next step depends on if you have already set up an email account, or not.
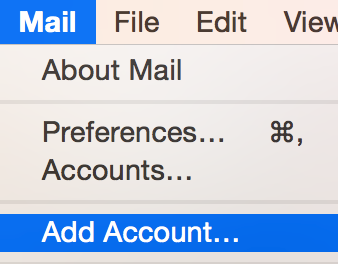
If you have already set up an email account, click the Mail menu, and select Add Account....
If you haven't set up an account, contact us for further information.
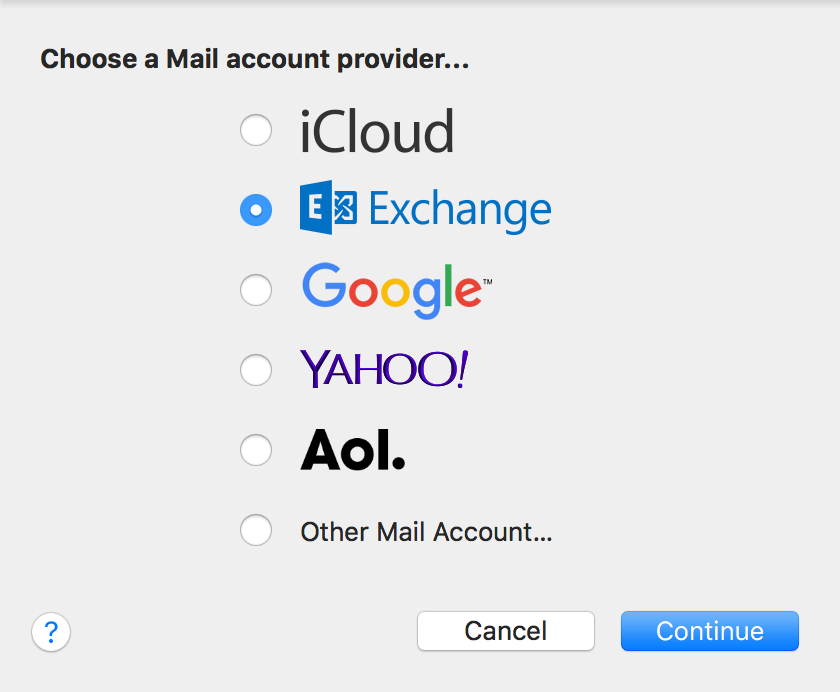
Select Exchange.
Click Continue
Complete the following details:
Field
What to do...
Name
Enter your name.
Email address
Enter your full Office 365 email address.
Password
Enter the password you set for that email address.
Click Sign In.
If you receive the warning "Internet Accounts couldn't log in to the Exchange server...", enter the following extra details:
Field
What to do...
Description
Enter a description for the account.
User Name
Enter your full Office 365 email address.
Password
Enter the password you set for your account.
Server Address
Type outlook.office365.com
Click Continue.
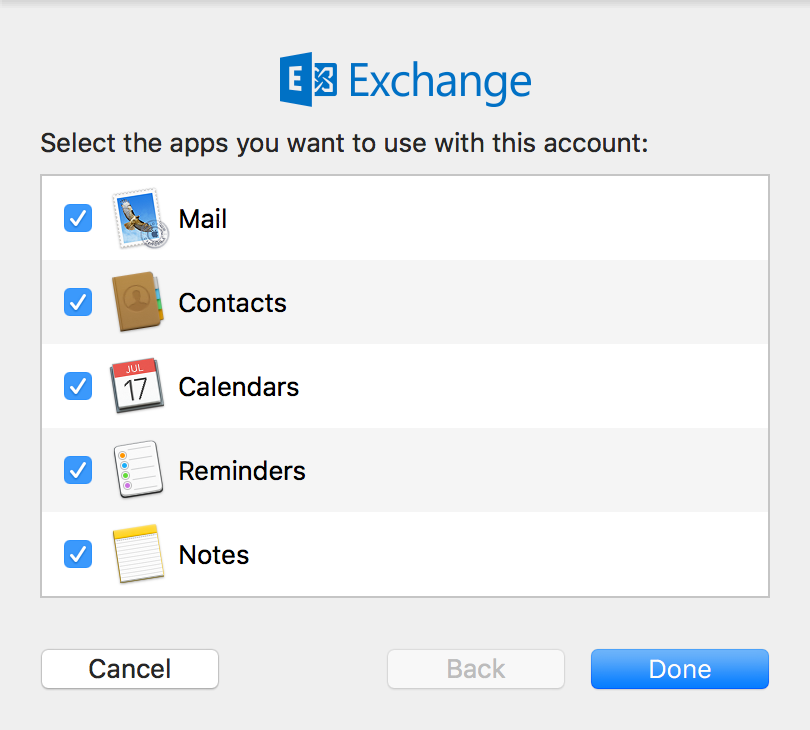
Select the applications you want to sync with your Office 365 email address.
Click Done.
4.4. How to set up a POP3 email account in Mac Mail
How to set up a POP3 email account in Mac Mail
To set up email, first launch mail and then select Preferences from the Mail application menu.
A window should appear showing all email accounts that are set up to work with Mail. If the window doesn't appear, click on the
Accounts icon at the top of the window.
Select the plus button(+) at the bottom of the Accounts pane to add a new account.
From the below screen choose Add Other Mail Account and click the Continue button
The below screen will then appear. Enter in your details and click the Create button.
You should then get a screen similar to the below saying that the account will need to be manually configured. Click the Next button.
The next page will be incoming server info. Check the mail server is the same as the below and your username is your full email address and click
Next.
The next page will be outgoing server info. Check the mail server is the same as the below and your username is your full email address and click
Create.
Your Mac Mail email account should now be setup and ready to use. Close the Preferences window and get started.
In summary your server settings should be:
Incoming Server Settings
Server name: outlook.office365.com
Port: 995
Encryption method: SSL
Outgoing Server Settings
Server name: smtp.office365.com
Port: 587
Encryption method: SSL/TLS
SMTP authentication: ticked
Authentication: your password
If you have software OS X 10.9 follow these steps to set up email:
Follow steps 1 - 3 above.
Select account type as (other account).
Enter your details.
The account will now be checked and you'll be informed that the Account must be manually configured.
Make sure the tab for POP is selected and replace pop3.btconnect.com with outlook.office365.com and click Next.
Replace smtp.btconnect.com with smtp.office365.com and click Create.
Close the setting window and start using your account.
4.5. Setting up an Out of Office message (Apple Mail)
This document explains how to set a vacation or out of office message using Apple Mail. These instructions are for Mac OS 10.9 and above, but are likely to be similar for Mac OS 10.5-8.
Note: The account you are configuring must be an Office 365 account and configured via Exchange.
Start Mail.
Right-click on any folder and select "Get Account Info." The account information screen will appear.
Click the "Out of Office" tab and enter the desired preferences:
Send Out of Office replies: place a check mark in this box and select "While scheduled" from the select box.
Starting change to the desired start date/time - IMPORTANT: this setting cannot be a future date. If you want to set this vacation message to start sometime in the future, use Outlook Web App.
Ending change to the desired end date/time
Internal Reply: type the response that you want to send to anyone within your company Office 365 user base.
External Reply: type the response that you want to send to anyone outside your company Office 365 user base.
Close the window. Your account will now send automatic replies.
5. Microsoft Outlook 2016, 2019 & Microsoft 365
5.1. Download and install apps
Download and install apps
As you're getting your Microsoft 365 business subscription setup, you'll want to download and install your Microsoft 365 apps, like Word, Excel, Microsoft Teams, and PowerPoint, on your PC or Mac.
Go to microsoft365.com and sign in with your Microsoft 365 account.
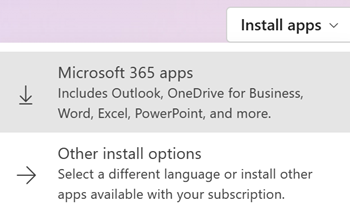
Select Install apps from the top right corner of the screen.
Follow the instructions in the browser to download the installer and start your installation.
Tip: As your apps are installing you might see the User Account Control prompt pop up and ask Do you want to allow this app to make changes to your device? Select Yes.
Close the installer window after it's finished.
The first time you open an app like Word or PowerPoint you might need to sign in with your new business email address and password to activate the app.
Tip: Signing in connects the apps to the rest of Microsoft 365, letting you save files to the cloud, share files with others, and have your documents save automatically as you work.
5.2. How to Create Local .pst files in Outlook and move emails/folders
How to Create Local .pst files in Outlook and move emails/folders
This is used when someone wants to save Outlook emails locally.
Step-by-step guide
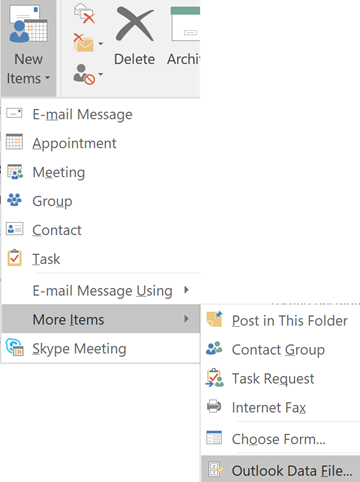
From the Inbox, select New Items > More Items > Outlook Data File.
Enter a File name.
The default location for new .pst files is C:\Users\username\Documents\Outlook Files. The default file name is: My Outlook Data File.pst, but you can rename this to whatever you like. NOTE: ITS recommends that you create .pst files in this default directory. This is important to easily locate your .pst files and is especially important if you move to a new computer and need to move a Windows profile NOTE: Microsoft does not support .pst files being stored on a network share
Click OK.
In Outlook, scroll to the bottom of the mailbox list in order to see your new local folder, and click the > icon to open the folder. There are two default folders in your new .pst folder -- Deleted Items and Search Folders. You can now create new sub-folders for storing mail.
To move email to the .pst local folder, select it in the Inbox and drag and drop to the local folder. You can move a single email, a group of emails, or even an entire mailbox. Note that the more items you select in a single batch, the longer it will take to process.
5.3. Export or backup my contacts, calendar and email
Export or backup my contacts, calendar and email
Outlook for Windows
Outlook 2013, 2016, or newer (Windows)
Microsoft ended support for Office 2013 (versions earlier than
15.0.4971.1000) on February 28, 2022 and all versions will be phased out
by April 2023. Microsoft ended support for Office 2016 (versions
earlier than 16.0.4600.1000) on March 28, 2022.
These instructions are for reference only. Learn more from Microsoft.
Open Outlook.
In the upper-left corner, select File.
Select Open & Export, then Import/Export.
Select Export to a file, then Next.
Select Outlook Data File (.pst), then Next.
To export the entire mailbox, select the name of the email account
and continue to the next step. Or, to only export your Calendar or
Contacts folder, select the folder you want to export. (You can export
one type at a time, so you'll need to repeat these steps to export both
Contacts and Calendars individually.)
Make sure the Include subfolders checkbox is selected, then select Next.
Select Browse to choose where to save the Outlook Data File (.pst). Enter a file name, then select OK.
If you're exporting to an existing Outlook Data File (.pst), under Options, specify what to do when exporting items that already exist in the file.
Select Finish.
The export begins immediately unless a new Outlook Data File (.pst)
is created or the export is to an existing .pst file that's password
protected.
If you're creating an Outlook Data File (.pst), an optional password can help protect the file. When the Create Outlook Data File dialog box appears, enter the password in Password and Verify Password, then select OK. In the Outlook Data File Password dialog box, enter the password, then select OK.
If you're exporting to an existing Outlook Data File (.pst) that's password protected, in the Outlook Data File Password dialog box, enter the password and select OK.
Outlook for Mac
Outlook 2016 or newer (Mac)
Microsoft ended support for Office 2016 (versions earlier than 16.0.4600.1000) on March 28, 2022.
If you're in the new version of Outlook, turn off the New Outlook toggle. Otherwise, continue to the next step.
On the Tools tab, select Export. (If you don't see Export, look for it on the Outlook File menu.)
In the Export to Archive File (.olm) box, select
the checkboxes next to the items you want to export (select all of them
to export your entire mailbox), then select Continue.
In Save As, under Favorites, select the Downloads folder, then select Save.
You'll be notified once your data is exported. Select Finish.
Export to an Outlook for Mac Data File
When you export to an Outlook for Mac Data File, you can choose to
filter information by category or by item type. During the export
process, you can choose to keep the exported items in Outlook, or to
delete them after they are exported.
Microsoft Exchange and directory services accounts don't export contacts from the directory or items stored in public folders.
On the File menu, select Export, then Outlook for Mac Data File.
Choose an option to filter by category or item type. (To export all items in Outlook, select Items of the following types, then select all the checkboxes.)
Select the right arrow to continue, then follow the instructions. The Outlook for Mac Data File saves with the .olm extension.
Export contacts in a tab-delimited text file
Export contacts and related contact info directly as a tab-delimited
text file. You can open this file using other mail, spreadsheet, and
database applications. Encryption certificates aren't exported.
On the File menu, select Export.
In the Export Assistant, select Contacts to a list, then follow the instructions. Tab-delimited files are saved with a .txt extension.
Export individual items
You can also export single items as individual files either to have as a backup or to use in other applications.
In the item list, select the item that you want to export. (To
select multiple items, hold down the Command key as you click the
items.)
Item
File type
Email messages
.eml
Contacts
.vcf (vCard)
Calendar events and tasks
.ics
Notes
.html
Drag the selection to the desktop or a folder in the Finder.
5.4. Remove and Re-add Microsoft Outlook Account
If your Microsoft Outlook account is exhibiting strange behavior, it is
quite simple to delete and then recreate it. The steps to do so are
presented below.
Mac
Remove Your Existing Outlook Account
On the Outlook main menu, select File > Preferences.
In the Preferences menu, select Accounts.
Select your account and click - in the bottom left corner.
Select Delete.
Quit Outlook.
PC Windows
Remove Your Existing Outlook Account
On the Outlook main menu, select File.
With Info selected in the left frame, click on the Account Settings icon in the right frame.
In the Account Settings drop-down menu, select Account Settings...
In the Email tab, click on your Davidson email address to select it.
With your Davidson email address selected, click on the X Remove toolbar icon just above the selected email account.
Click on the Yes button.
Click on the Close button.
Close Microsoft Outlook 2016.
5.5. Add your account as Exchange (Mac)
Add your account as Exchange
Create a new account with Exchange settings.
Open Outlook.
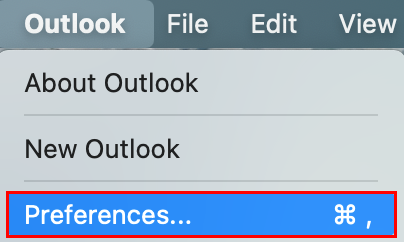
From the menu bar, select Outlook, then Preferences.
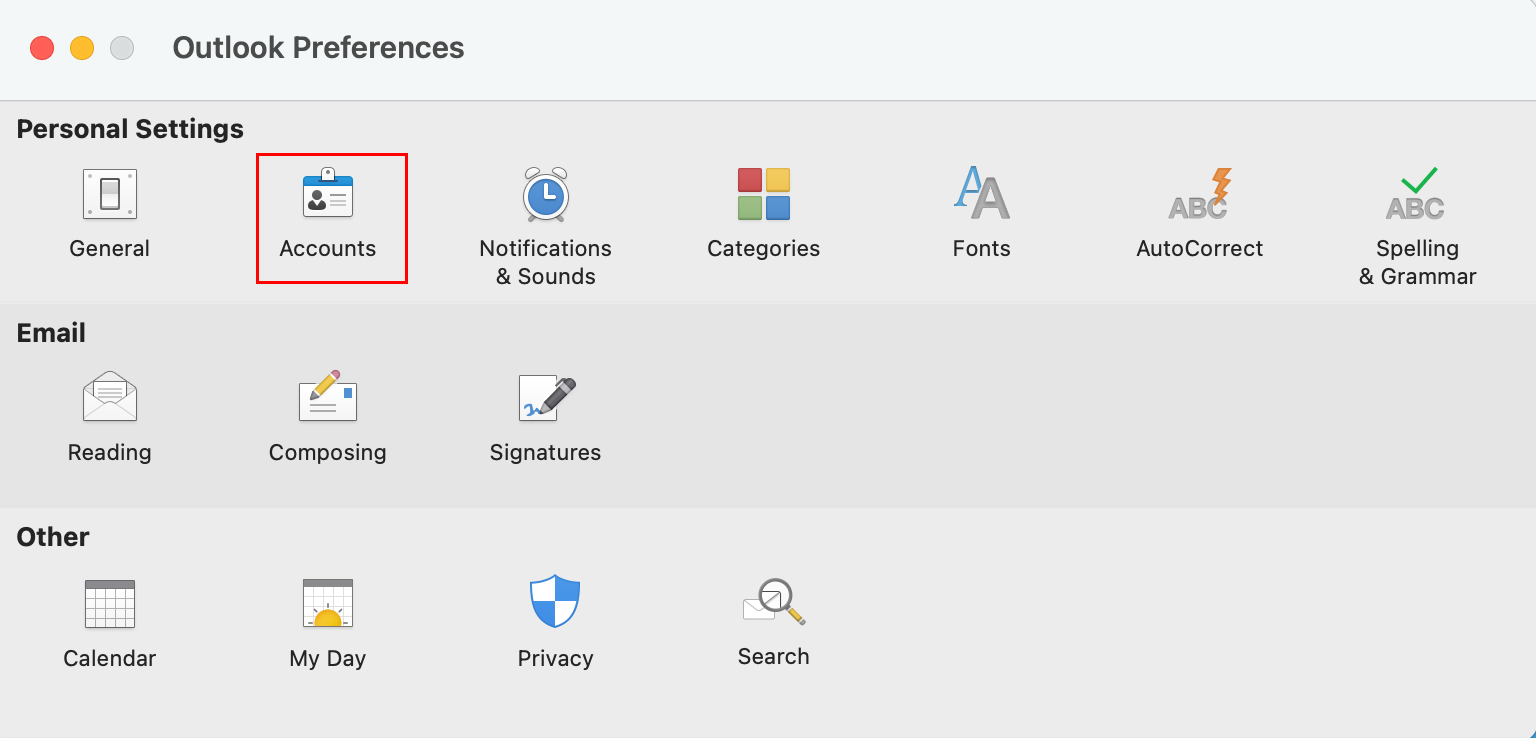
Select Accounts.
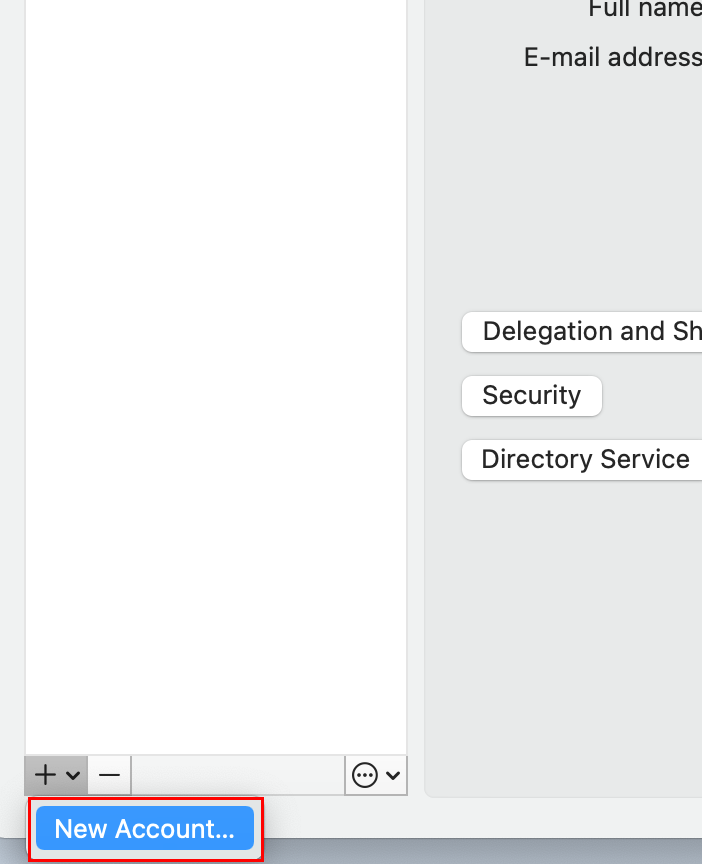
Select + (plus), then New account.
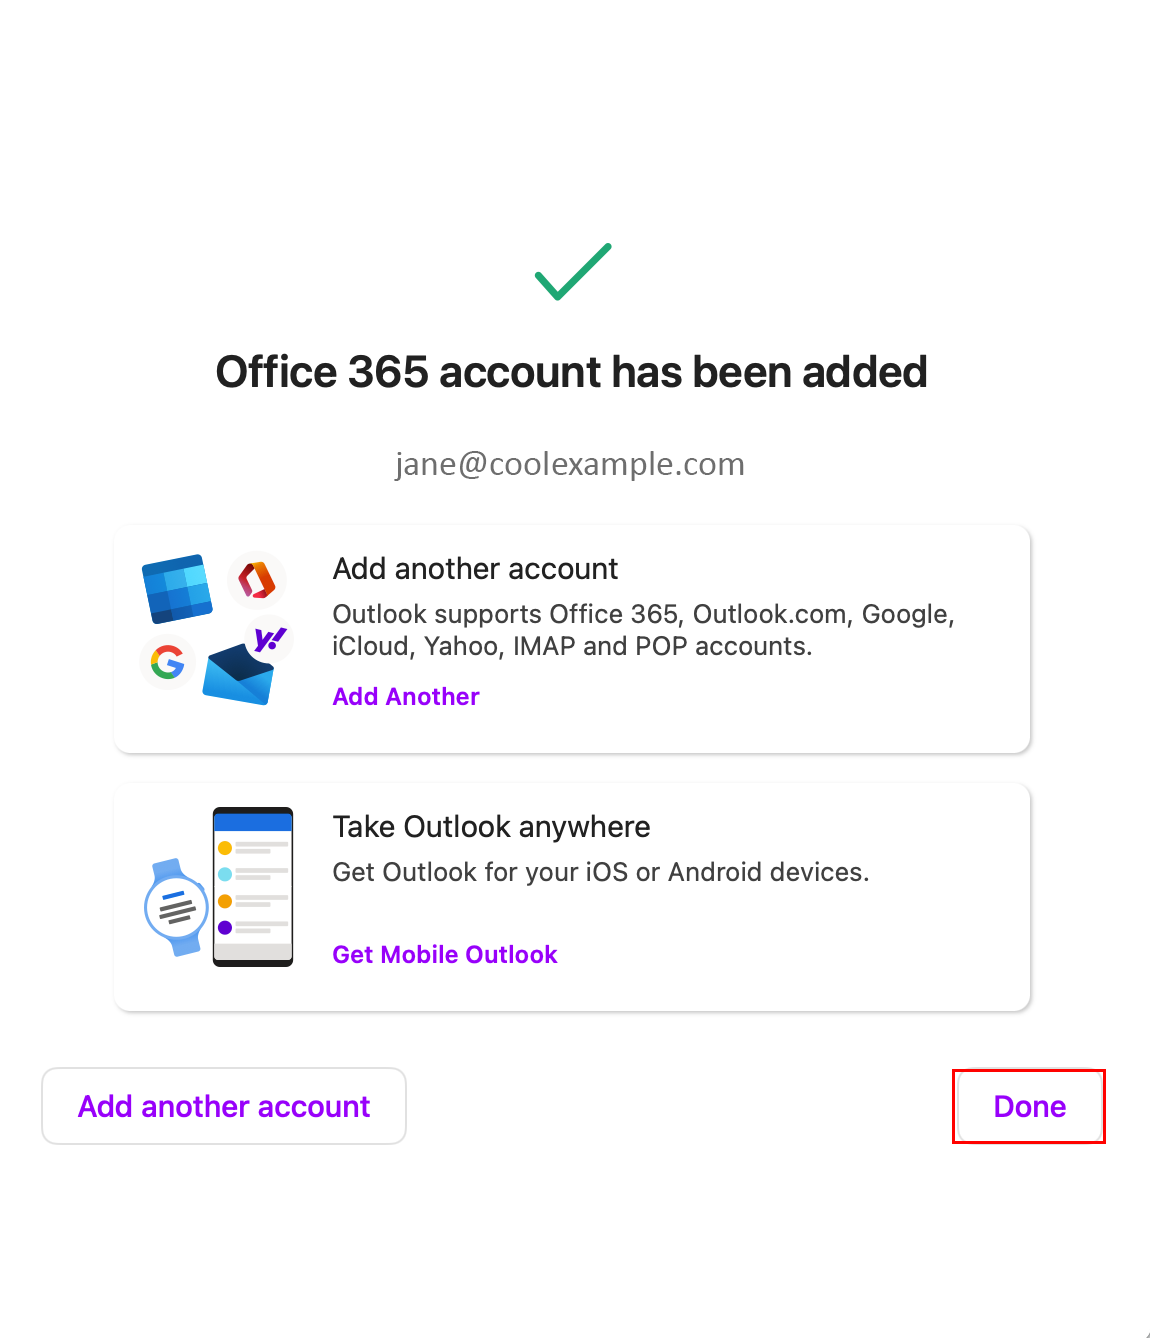
Enter your email address, and then select Continue (You might need to choose your account type as Work or school, not Personal, to continue).
Enter your email Password, and then select Sign In.
Note: AOL and Verizon customers
who need to update their account settings after AOL's recent change to
their server settings should see the section Update your email settings in Outlook for Mac. When checking your encryption settings, make sure they're set to SSL, SSL/TLS, or Auto and not TLS only.
Add a new account quickly
Most email accounts, including Microsoft 365, Exchange
server accounts, Outlook.com, Hotmail.com, Live.com and Google accounts
can be set up in a few quick steps.
Select Outlook > Preferences > Account.
Click the plus (+) sign > New Account.
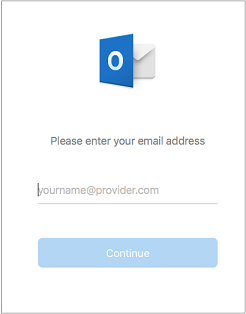
Type your email address > Continue.
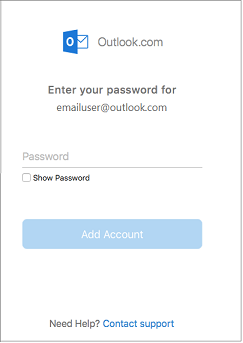
Type your password > Add Account. (Your screen might look different from this one depending on the account you're adding.)
If adding a Yahoo, or other IMAP or
POP account, you might be taken to those sites and asked to allow
Outlook to access your mail, contacts, and calendars. Click Allow to continue.
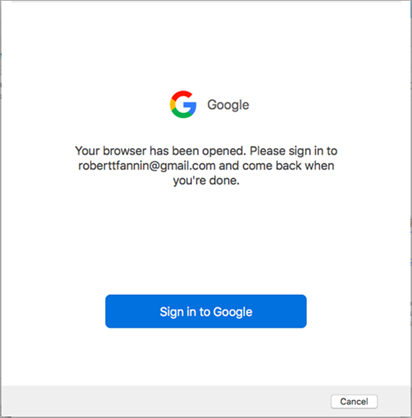
If you are adding Gmail, you will get a prompt within Outlook to sign-in to your Google account. This is for users who are on Build 16.15.18070902 and higher.
These steps are the same whether you're adding your first email account or additional email accounts to Outlook.
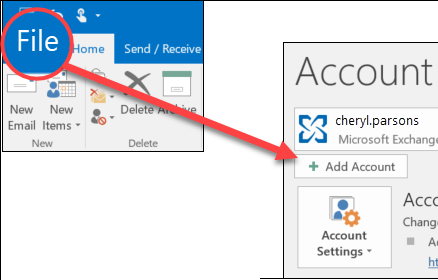
Select File > Add Account.
What you see next depends on your version of Outlook.
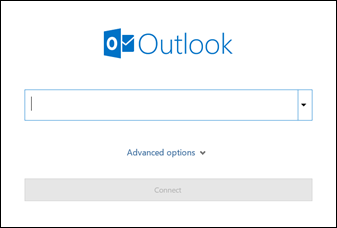
For Outlook for Microsoft 365 and Outlook 2016:
Enter your email address and click Connect.
For Outlook 2013 and Outlook 2010:
1. Enter your name, email address, and password, and click Next
2. If prompted, enter your password again, then select OK > Finish to start using your email account in Outlook.
5.8. Set up the Microsoft Authenticator app
Set up the Microsoft Authenticator app
The
Microsoft Authenticator app helps prevent unauthorized access to your
email account. Whenever you sign in to your account, the app confirms
your identity and ensures your essential information stays protected.
Add the Authenticator app on up to 5 devices.
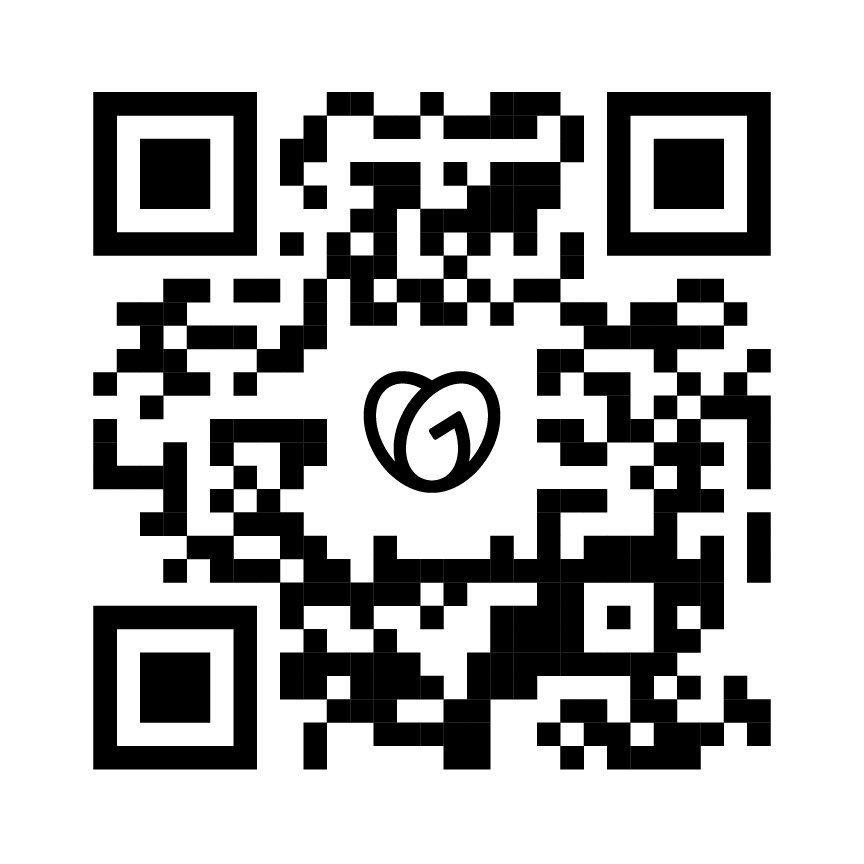
Required: Before continuing, install the Microsoft Authenticator app for iOS or Android. To get Microsoft Authenticator, use your phone's camera to scan this QR code.
If your mobile device doesn’t support the Apple App Store or Google
Play Store, open your app store and search for "Microsoft
Authenticator."
Step 1: Add the Authenticator app
First, add the Authenticator app as a sign-in method to your account.
You need your computer and your mobile device with the Authenticator
app installed.
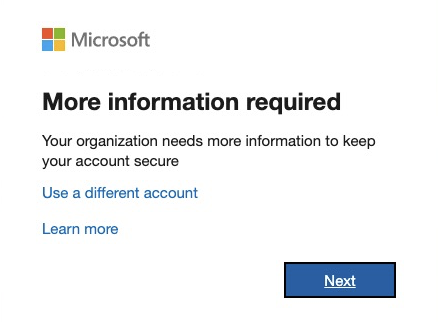
If you can't sign in, select Next. Then continue to the next step.
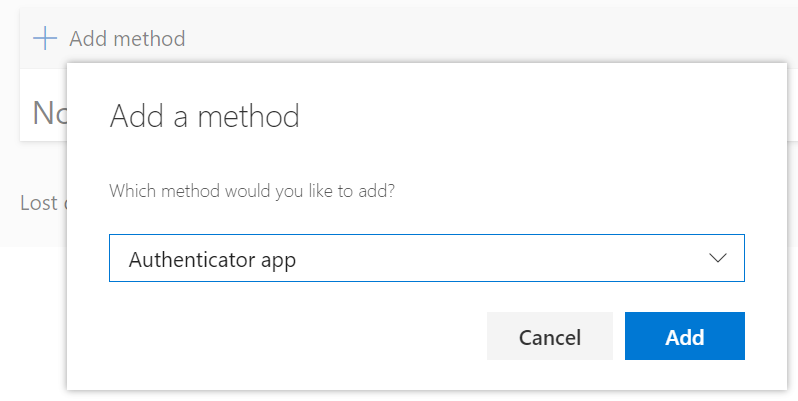
If you can sign in, select Add method. Select Authenticator app from the list, and then select Add.
Under Start by getting the app, select Next. You should have the app already installed on your phone.
On your mobile device, open the Authenticator app. If prompted, allow notifications.
Tap +, then Work or school account, and then Scan QR code.
If this is your first time using the app, you can select Add account instead.
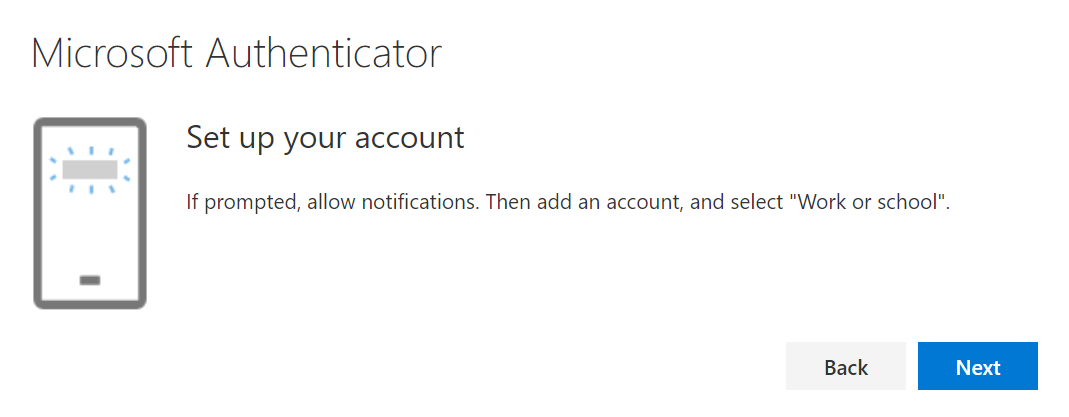
On your computer, under Set up your account, select Next.
Use your mobile device's camera to scan the QR code shown on your computer.
On your computer, under Scan the QR code, select Next.
Note: To enter the code without using a QR scanner, select Can't scan image. In the app, at the bottom of the screen, select Or Enter Code Manually. Enter the code and the URL, and then select Finish.
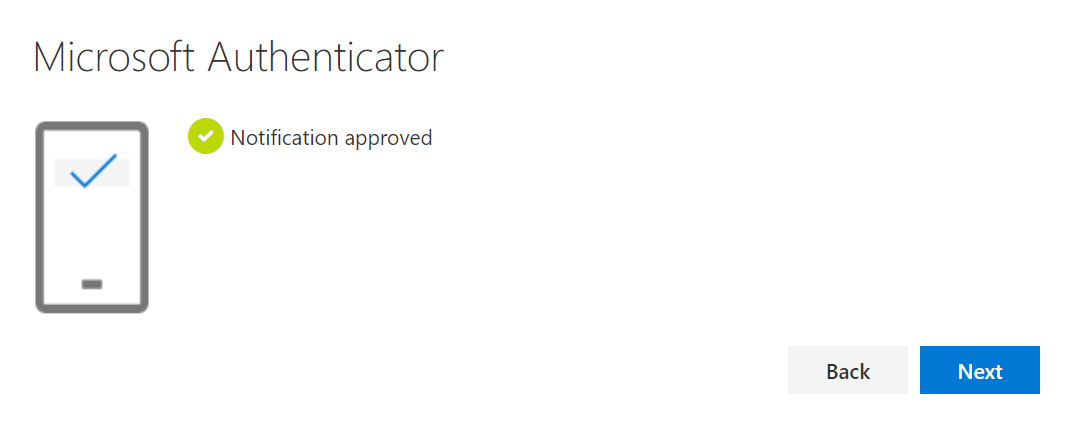
On your mobile device, the app will ask you to approve the sign-in. After the notification's approved, select Next on your computer.
Step 2: Add a phone number
If it isn't already added, you might need to enter your phone number as a sign-in method.
On your computer, enter a phone number, select Text me a code or Call me, and then select Next.
Enter the code, and then select Next.
After your phone's verified, select Next.
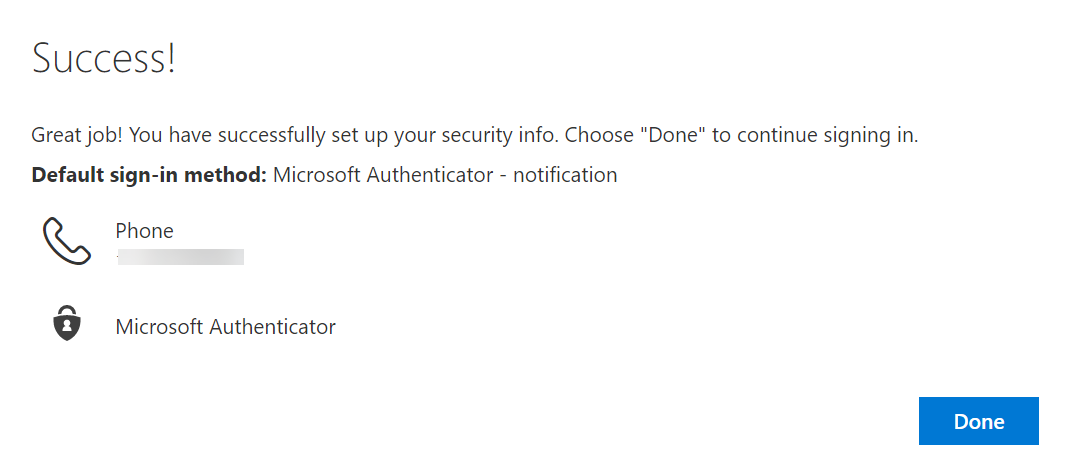
You'll see a success message. Select Done. You'll also see Microsoft Authenticator on the Security info page. In the app, your email account will appear under Authenticator.
Now, whenever you sign in to your account, you'll confirm your identity with the app.
5.9. How to grant Exchange and Outlook mailbox permissions in Office 365
Choose
the appropriate option depending on whether the mailbox is shared with
you or you are a delegate for another user's mailbox.
Notes:
When you use any of these methods, the shared mailbox account is added as an option in the From field when you compose emails. This lets you select the account in the From field
regardless of whether you have permissions to send from this account.
If you do not have "Send As" or "Send On Behalf of" permissions for the
account, email from the account will not be sent.
Outlook for Mac does not support Auto-mapping of shared mailboxes.
A folder is shared with you
If
another user has shared an inbox, primary calendar folder, or primary
contact folder with you, use this method to open the user's folder.
To open the shared folder:
On the File menu, click Open.
Click Other User's Folder.
You are a delegate for another user's mailbox
Use
this method if you are a delegate for another user's mailbox or when
you have permissions to several folders in a shared mailbox. You can
also use this method when you have full access permissions to a mailbox.
To open the shared mailbox:
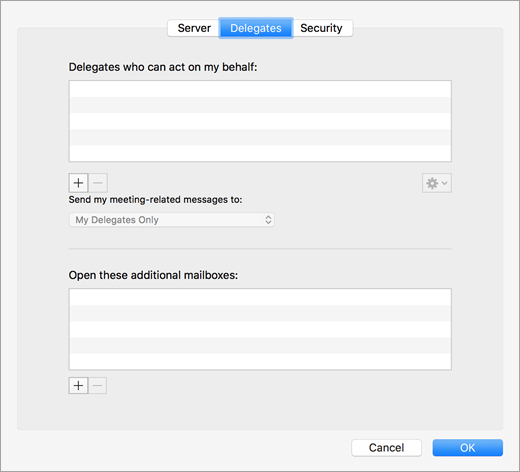
On the Tools menu, click Accounts > Advanced > Delegates.
Add the mailbox under Open these additional mailboxes
Note: If you have permissions to custom
folders in the mailbox but not to the top-level mailbox folder, the
custom folders will not appear in the folder list. Only default folders
that you have permissions to, such as Inbox, Sent Items, Deleted Items,
and Calendar, will appear in the folder list without top-level mailbox
folder permissions.
You have full access permissions to a shared mailbox
When
you have Full Access permission to a shared mailbox—that is, Full
Access permission of a mailbox set up through Exchange Admin Center
(EAC)—you can add the shared mailbox with your own credentials.
To open the shared mailbox:
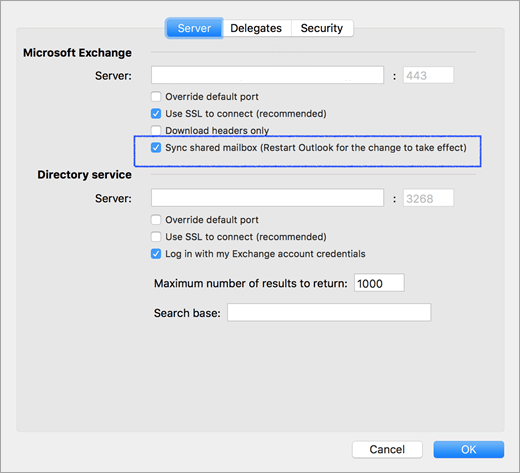
On the Tools menu, click Accounts.
Click the Plus Sign to add an additional Exchange account.
In the E-mail address field, enter the email address of the shared mailbox.
Under Authentication, enter your own credentials.
Checking the setting Sync shared mailbox will allow Outlook to synchronize the shared mailbox without requiring the user to click Send/Receive.
This setting was added in version 16.13.411. Enabling this setting is
highly recommended for users who use their own credentials to access a
shared mailbox.
Permissions for shared folders and mailboxes
The
following table summarizes the permissions options that may be
available for a shared folder or mailbox, and the best method for
opening the shared folder or mailbox based on the corresponding
permission.
Level of permission to shared folder or shared mailbox
Method to open shared folder or mailbox
Folder-level permission to the Inbox, Calendar or Address Book primary folder
Open other user's folder
Delegate permission to a mailbox
Add the mailbox under "Open these additional mailboxes" under account advanced settings
Folder-level permission to the Task and Note primary folders
Add the mailbox under "Open these additional mailboxes" under account advanced settings
Top-level mailbox level permission to access the top-level folder and other custom folders
Add the mailbox under "Open these additional mailboxes" under account advanced settings
"Full Access" permission to a mailbox on Exchange
Use your own credentials to add an additional Exchange account
Opening additional mailboxes
As an alternative to these methods, you can add another Exchange account by using additional
mailboxes credentials. This method is not recognized as adding a shared
mailbox, because you are adding the additional account by using its own
credentials. To open the additional Exchange account, follow these
steps:
On the Tools menu, click Accounts.
Click the plus sign and then click New Account to add an additional Exchange account.
In the E-mail address field, enter the email address of the shared mailbox.
Under Authentication, enter the credentials for the shared mailbox.
5.10. Fixes or workarounds for recent issues in Outlook (Mac & PC)
Fixes or workarounds for recent issues in Outlook for Mac
Add your Microsoft 365 email to the Mail app on your iPhone or iPad. Then you can send, receive, and organize emails.
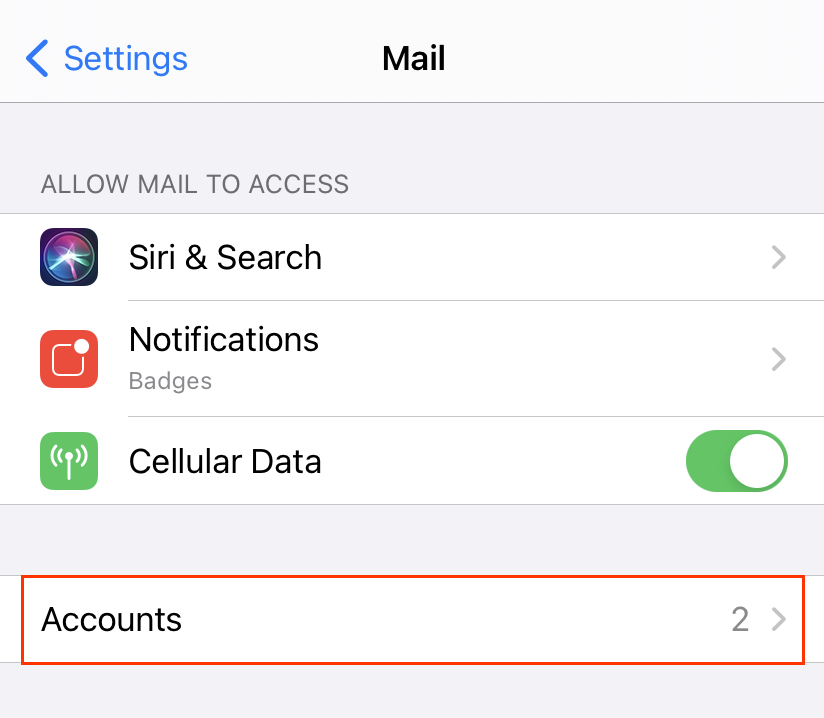
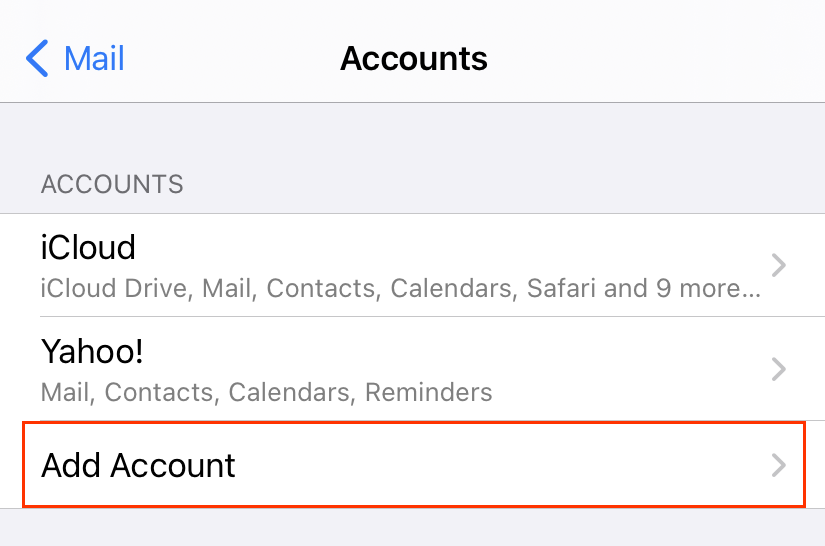
Go to your iPhone or iPad's Settings and tap Mail.
Tap Accounts.
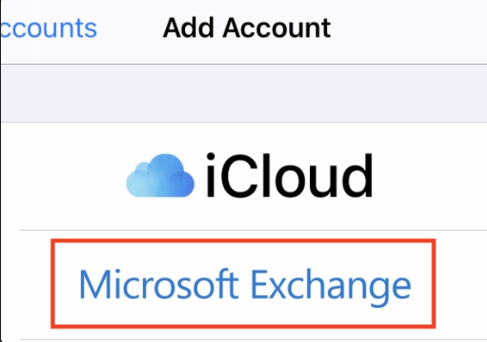
Tap Add Account.
Tap Microsoft Exchange.
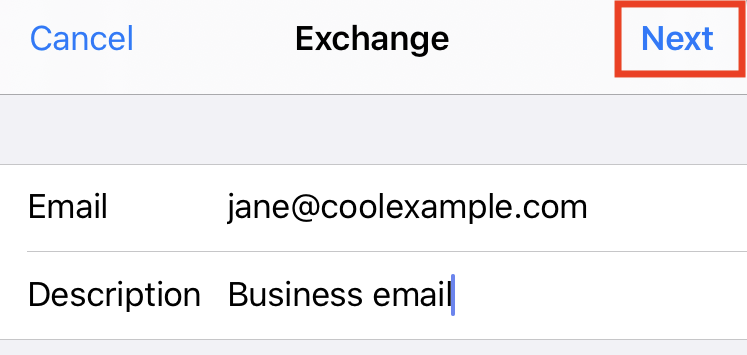
Enter your Email and a short Description (like your company's name or email type), and then tap Next.
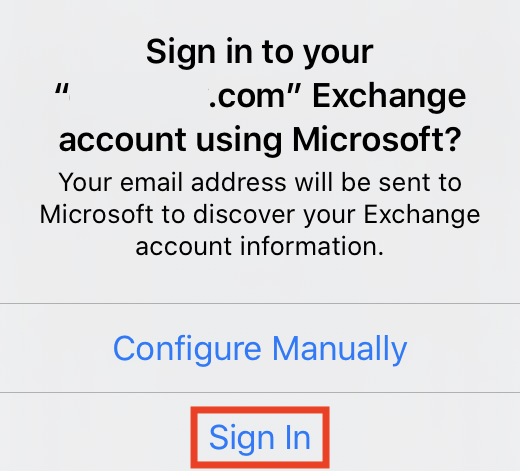
Tap Sign In to confirm you want to use your Microsoft Exchange account.
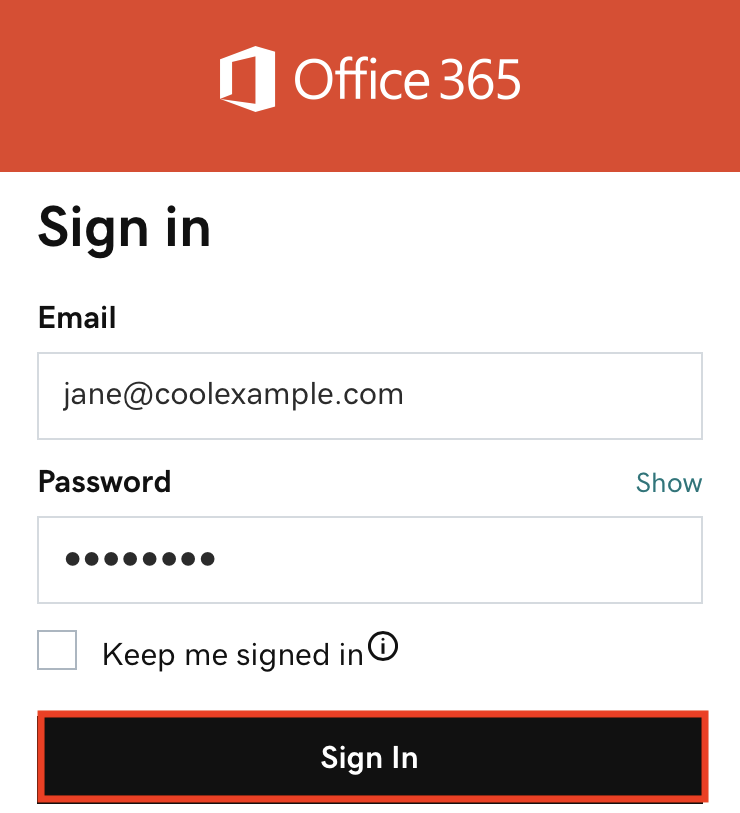
Enter your Password and tap Sign In. (You might need to choose your account type as a Work or School to continue.)
Note: If Microsoft can't find your account, you might be asked to enter your details manually:
• Email = your Microsoft 365 email address
• Password = your Microsoft 365 email password
• Server = outlook.office365.com (this is required)
• Domain = This can be left empty
• Username = your Microsoft 365 email address
If your admin enabled multi-factor authentication (MFA) (also
called two-step verification), you'll need to verify your account.
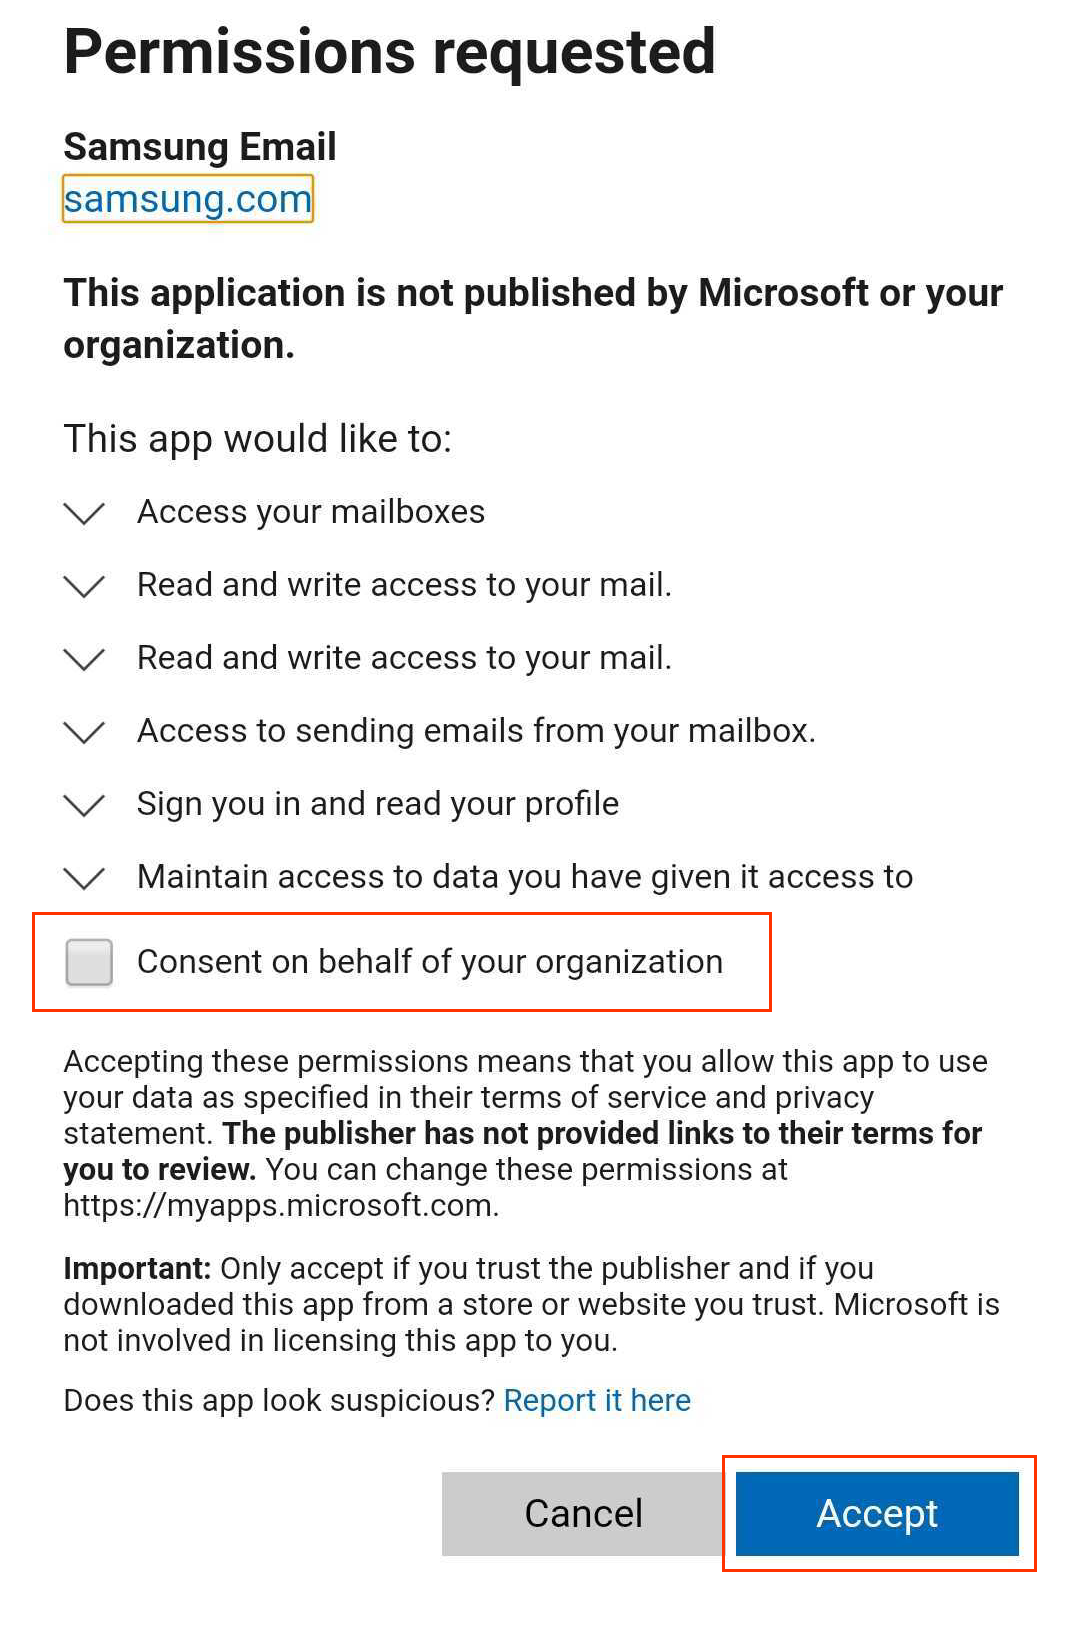
Tap Next. You might be asked to select Consent on behalf of your organization. This allows Microsoft 365 and the Mail app to work together. Tap Accept.
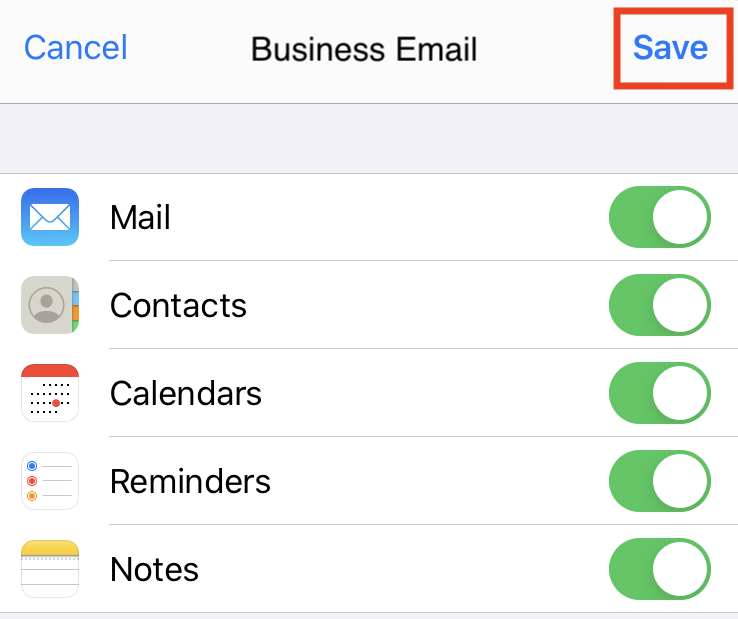
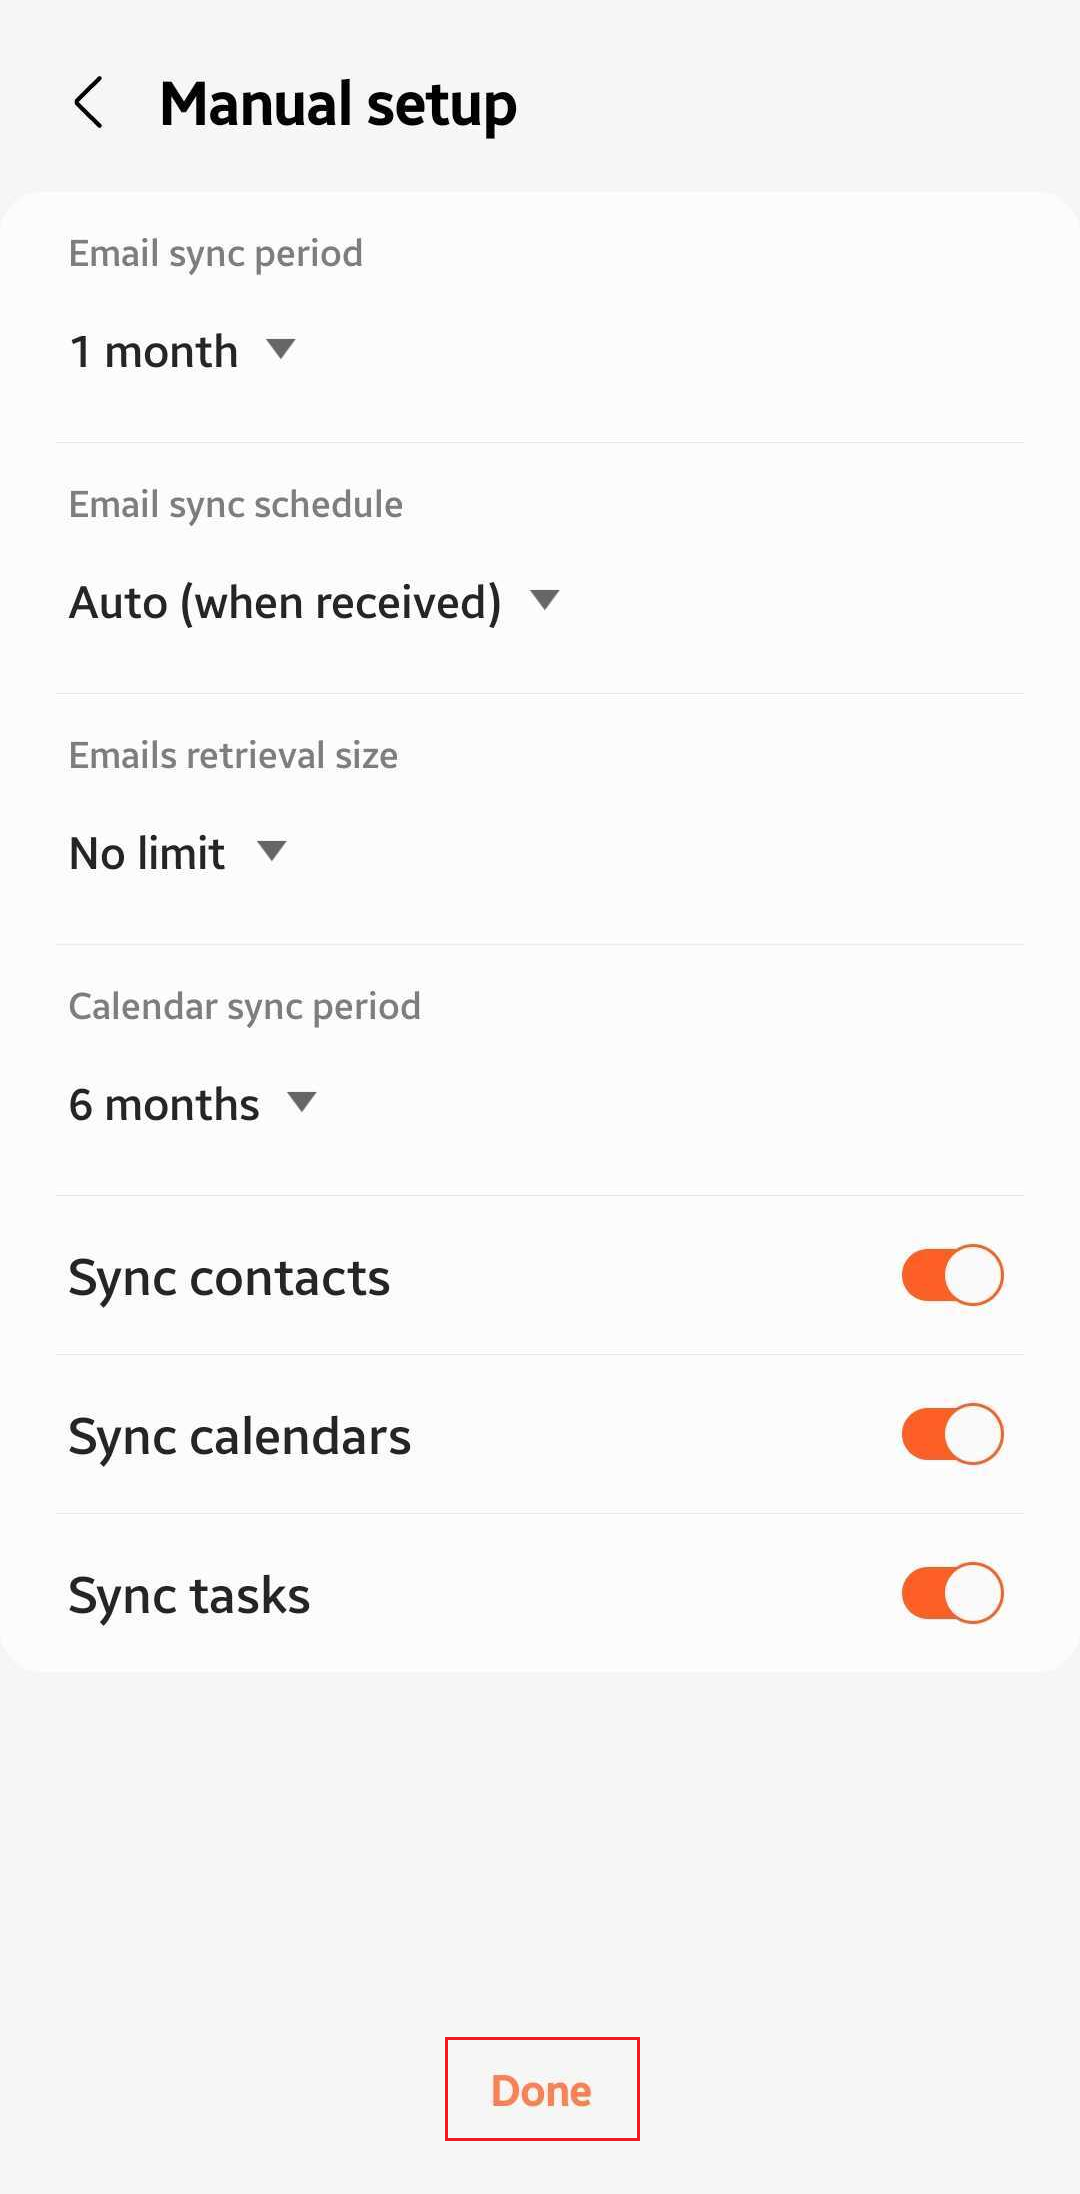
Tap Save. You can come back and update settings here at any point.
That's it! You'll see your Microsoft 365 account under Accounts.
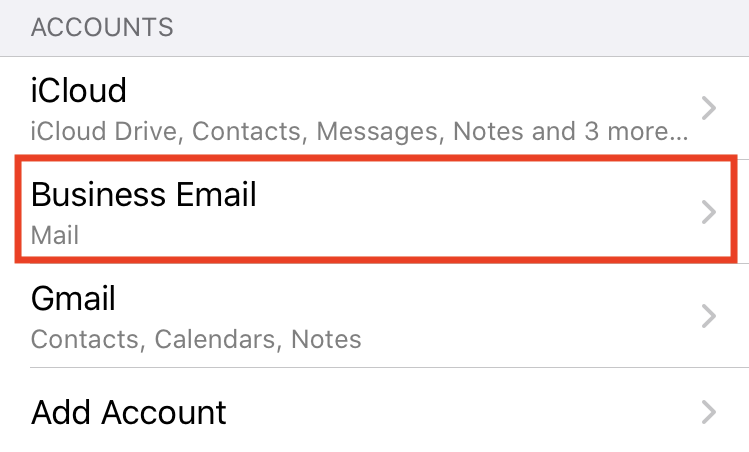
6.2. Set up a shared mailbox using the iOS Mail app
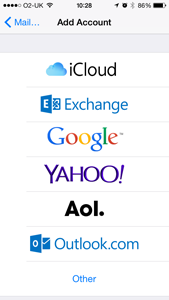
On the iPad or iPhone, go to SETTINGS > MAIL > ACCOUNTS > ADD ACCOUNT
2. Select OTHER from the list of types.
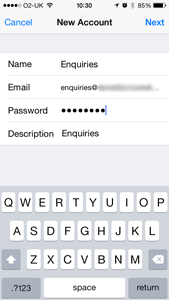
3. Select ADD MAIL ACCOUNT
4. Enter a name for the mail account (eg “Enquiries”)
5. Enter the email address of the shared mailbox
6. Enter the password of a mailbox that has access to the shared
mailbox (eg your own password if you have access to the shared mailbox)
7. Enter a description for the mailbox (eg “Enquiries”)
8. Tap NEXT
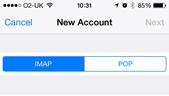
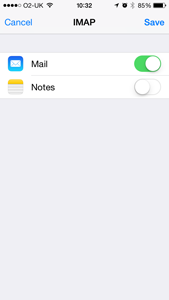
9. Select IMAP
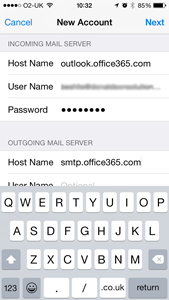
10. Fill in the blank information
i) Host name: outlook.office365.com
ii) In the user name box, enter the email address of the account that
has access to the shared mailbox, followed by a “\” and then the email
address of the shared mailbox itself. (eg “your.name@yourdomain.com\enquiries@yourdomain.com“)
iii) Outgoing mail server: smtp.office365.com
iv) User name: Enter the email address of the mailbox with the permission to “send as” the shared mailbox.
v) Password: Enter the password of the mailbox with the permission to access the shared mailbox (same as step ‘iv’ above)
vi) Tap NEXT
11. Tap SAVE
12. Switch off the NOTES sync which should leave just MAIL switched on.
13. Tap SAVE
14. Exit the MAIL app by ending the task (doublle press the HOME button and slide the Mail app off the top of the screen)
15. Enter the MAIL app and check that the account works
Your Office 365 shared mailbox is now configured on your device.
You will find your new email account in the standard Mail app on your
iPhone or iPad.
6.3. Set up email using the iOS Mail app (iOS 10)
Set up an Office 365, Exchange, or Outlook.com email in the iOS Mail app (iOS 10)
(1) Go to your iPhone or iPad's Settings > scroll down and tap Accounts & Passwords > Add Account.
Note: If you're on iOS 10, go to Mail > Accounts >Add Account.
(2) Select Exchange
(3) Enter your Office 365, Exchange, or Outlook.com email address and a description of your account. Tap Next.
Note: Tap Configure manually if you need to enter server settings.
(4) Enter the password associated with your email account. Tap Sign in or Next.
(5) The Mail app may request certain permissions. Tap Accept.
(6) Choose the services you want to sync with your iOS device and tap Save. You're done!
This article was last updated on January 3, 2018.
For further support please contact CIT (UK) on 01530 272727.
6.4. Setting up exchange email: for iPhone (older IOS)
This article and the instructions below explain how to set up your Office 365 email account in the mail app that came on your iPhone or iPad.
Tap Settings.
Tap Mail, Contacts, Calendars.
Tap Add Account.
Tap Exchange.
Enter your Email address, Password, and a short Description (e.g. your company's name) for your email.
Tap Next.
Autodiscover will try to find the settings you need to configure for your account. If autodiscover cannot find your settings, enter the following information:
What to enter
Server
outlook.office365.com
Domain
Leave this field blank
Username
Enter your full email address (for example, holly@coolexample.com)
Tap Next.
Tap Save.
Return to your home screen and open the Mail app you should see some email messages, in your new inbox!
To make sure you can send messages, compose an email and send it to yourself.
7. Samsung Galaxy
7.1. Add my Microsoft 365 email to Samsung Email on Android
Open Samsung Email.
If you're a new user, skip to step 3. Otherwise, tap Menu, Settings, and then Add account.
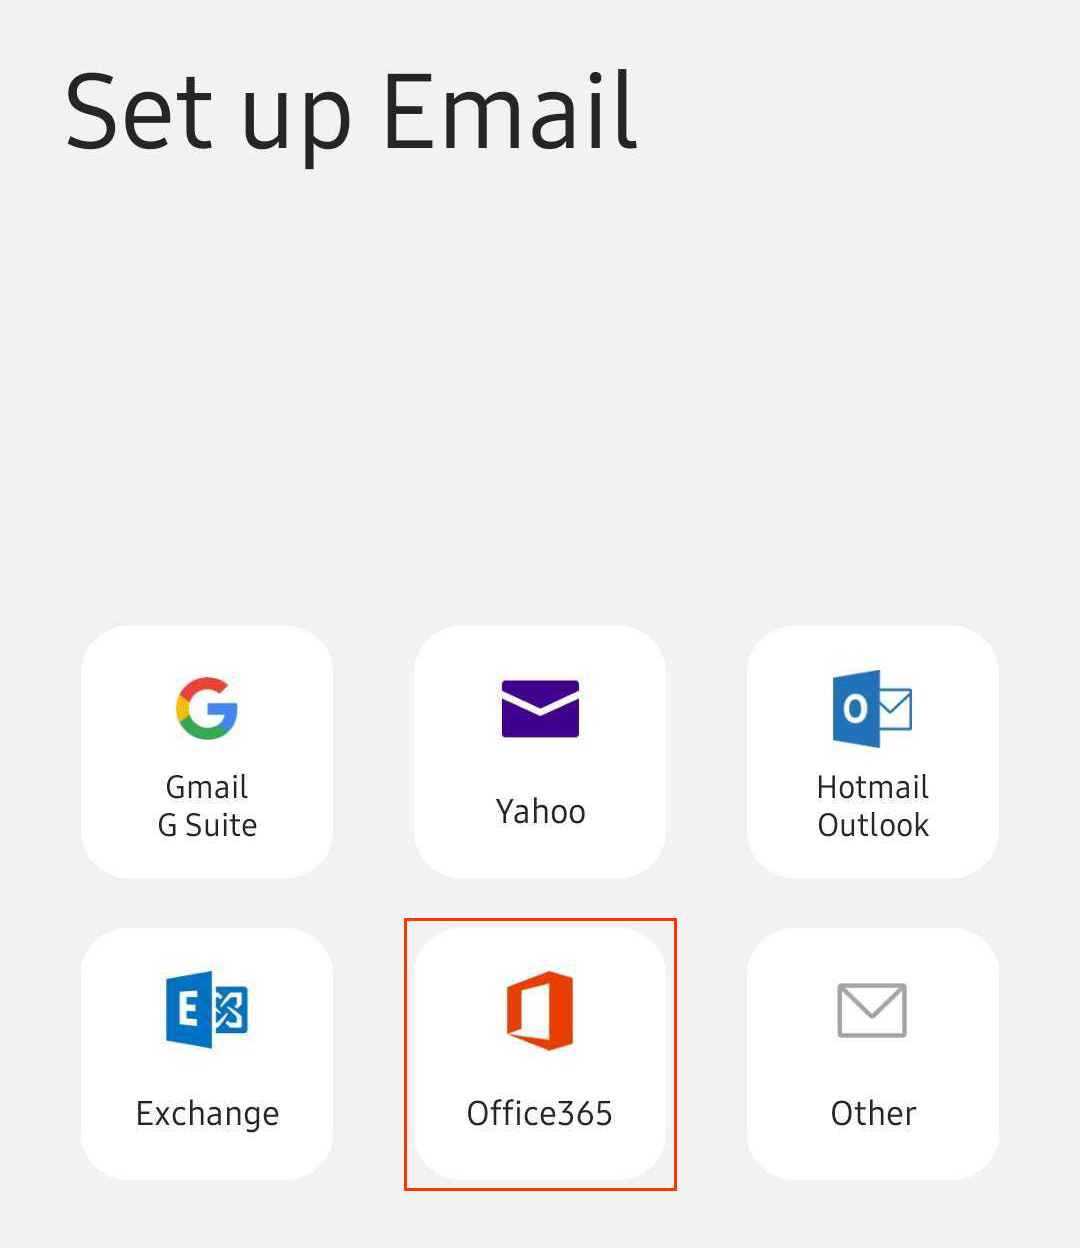
Tap Office365.
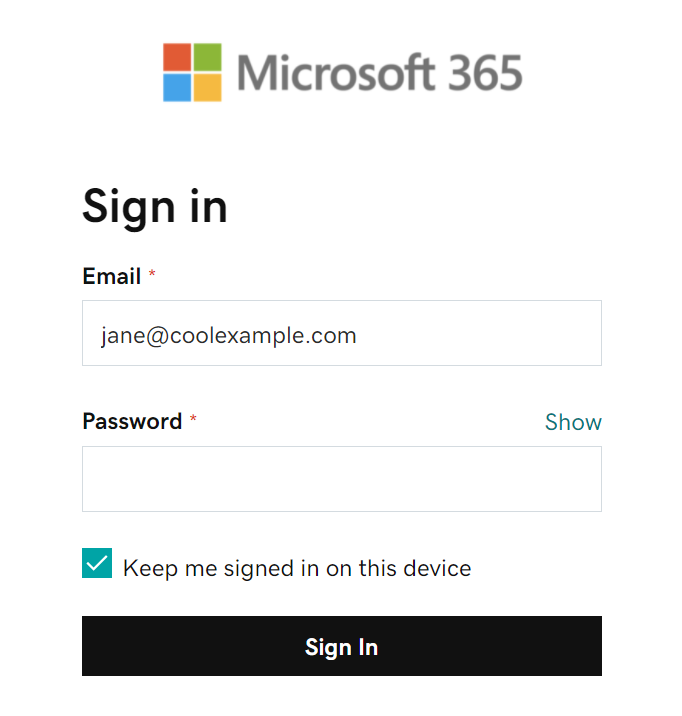
Enter your Microsoft 365 email address, and then tap Next.
Enter your Microsoft 365 email password, and then tap Sign In. You might need to choose your account type as Work or school, not Personal, to continue.
Note: If you forgot your email password, you can reset it.
Set up an Android device with a Microsoft® Office 365 or Exchange ActiveSync account
Gmail supports Microsoft® Office 365 and Exchange ActiveSync accounts, and comes pre-installed on all Android devices. To add your Microsoft® Office 365 or Exchange ActiveSync account to Gmail:
Open your device's Settings app. Tap Passwords & accounts. It may be called 'Accounts' or 'Users & accounts' on your device.
At the bottom, tap Add account.
Tap Exchange.
Enter your Microsoft® Office 365 or Exchange ActiveSync email and credentials.
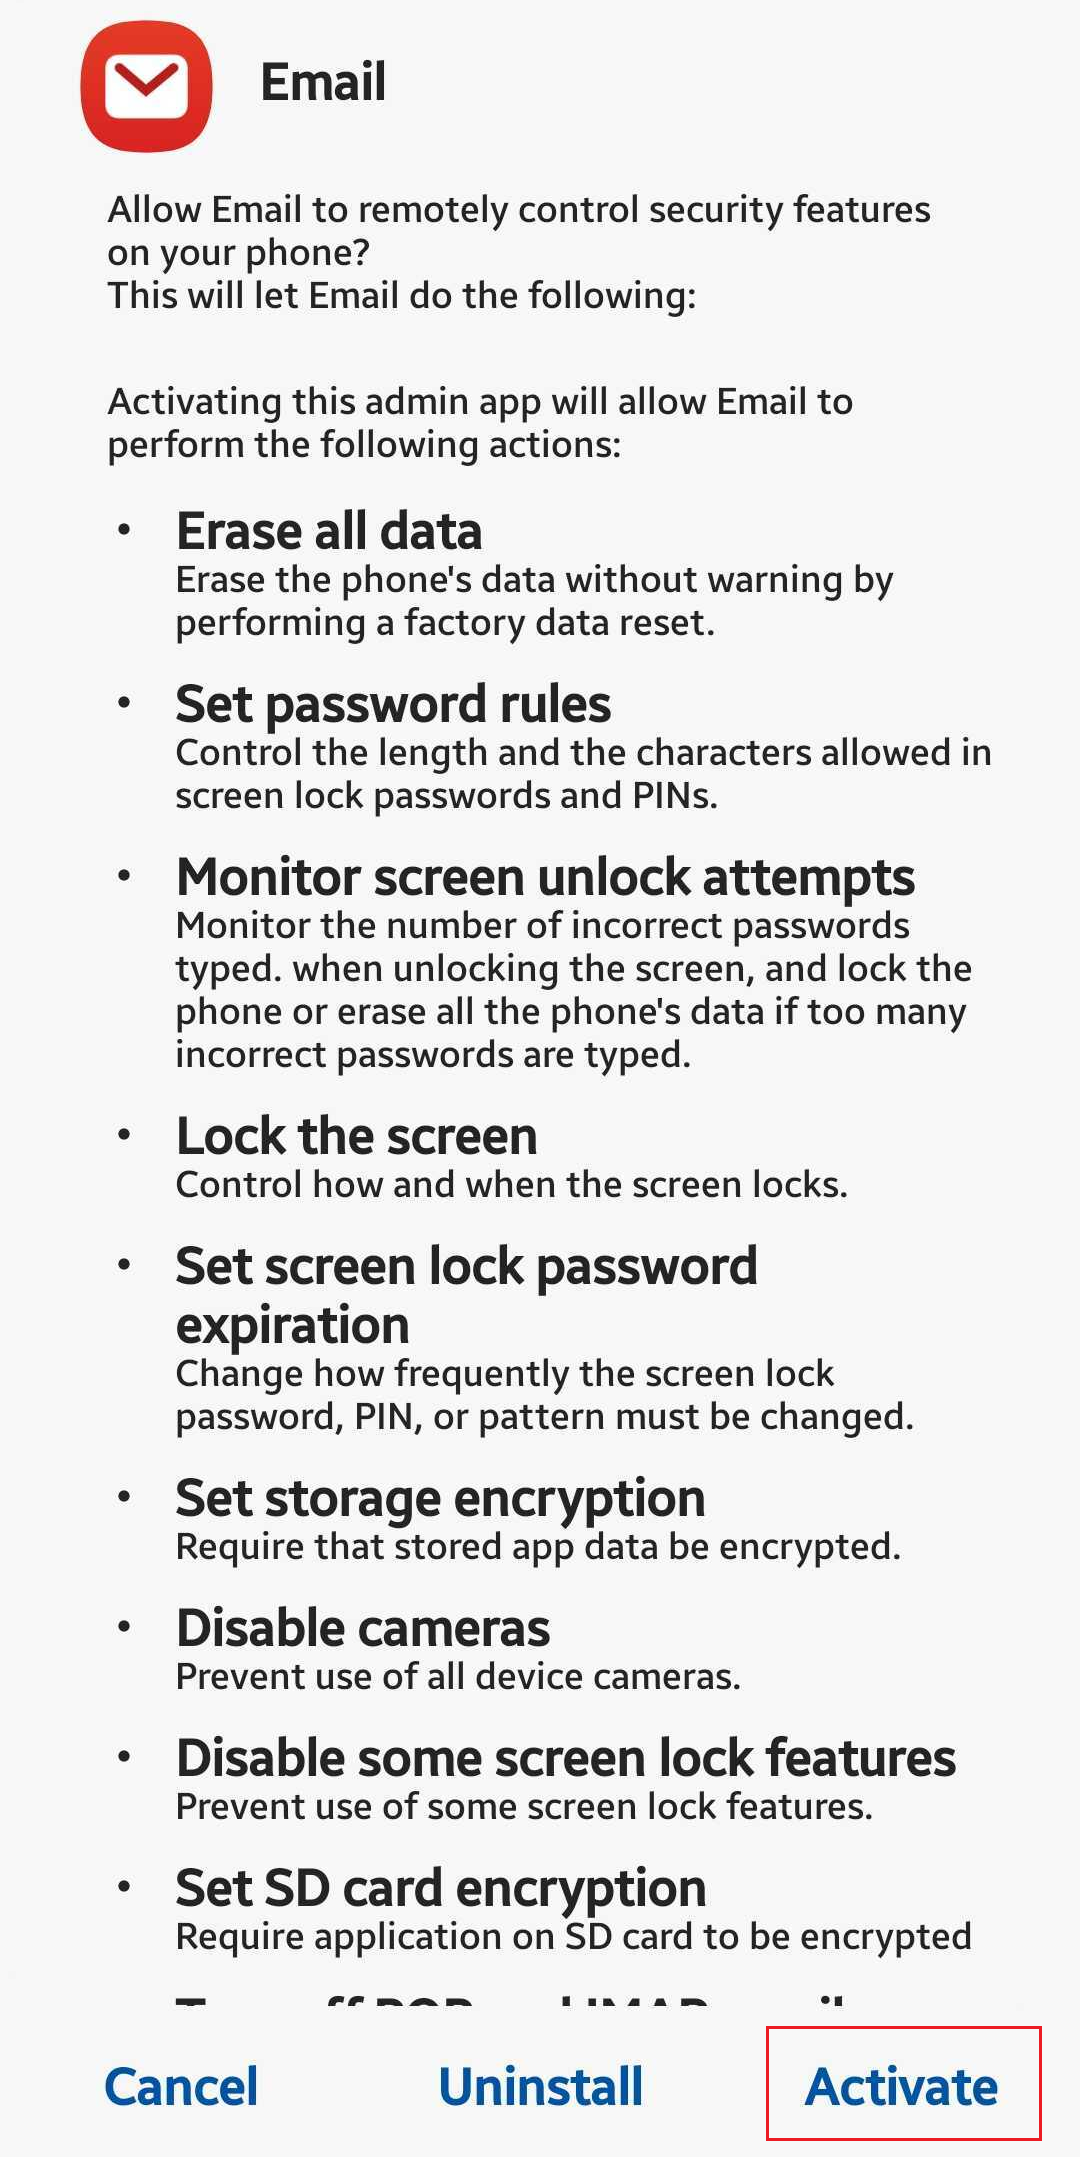
After you add your account to Gmail, you may be prompted to set up a password via the Mobile device mailbox policies if your IT admin requires it.
If your organization uses a different email client, consult your email client's documentation to determine whether it supports Microsoft® Office 365 and Exchange ActiveSync accounts and to learn how to set up your account.
Further information
Android mail apps may look different across different devices, and these directions may not exactly match the options you see. Use these steps as a guide or consult the manufacturer's help for your particular device.

 Help & Settings > Settings.


 , and then select Outlook.
 > Automatic replies.
 > Mail.
 > Outlook.

 > Options, and then select one of the following:
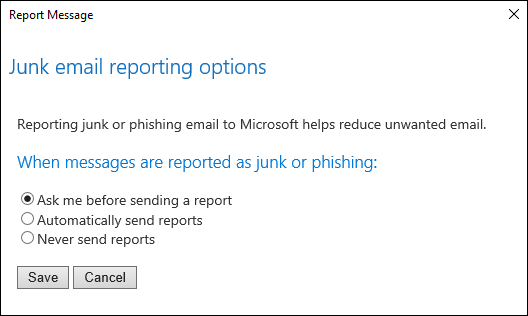

 next to the text box.
 .
.