Home → OS X Help → Networking → Mac OS X Lion and above: Creating Wi-Fi 802.1X Profiles
4.9. Mac OS X Lion and above: Creating Wi-Fi 802.1X Profiles
Mac OS X 10.7 (Lion) does not allow manual creation or configuration of 802.1X profiles for secure authentication on Wi-Fi and Ethernet networks for typical users. In order to access an 802.1X network in Lion, users are prompted to enter credentials when joining an active network that is in range, at which time it automatically detects the authentication settings that should be used.
The 802.1X tab in the System Preferences > Network > Advanced section no longer allows manual 802.1X profile creation.
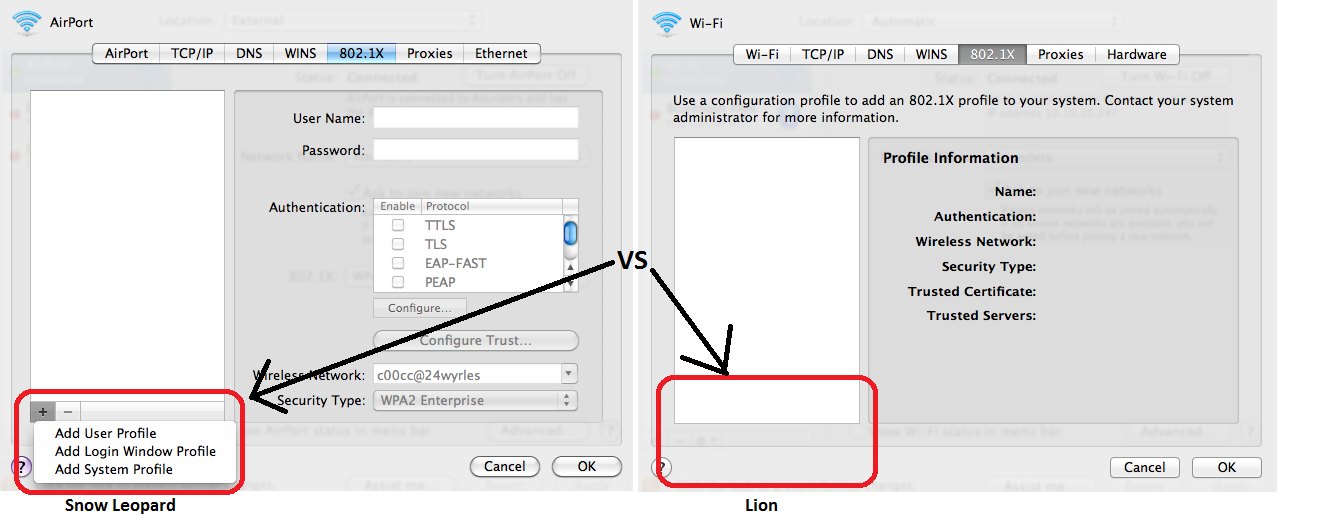 |
| Mac OS X 10.7 (Lion) 802.1X Profile Restriction |
Lion forces the use of a configuration profile which must be created from Lion Server or using the iPhone Configuration Utility (iPCU). The config file is nothing more than an XML file containing the settings and usually has a .mobileconfig extension. Since Apple has decides to stop selling the Xserver line a year ago, most administrators will rely on the iPCU.
This restriction can be problematic for engineers wishing to test various client configuration scenarios without a live network. Many enterprise environments support multiple EAP types on their authentication servers in order to support various client deployment scenarios. Therefore, an engineer may wish to switch between profiles on the fly to test multiple authentication types. Additionally, user-created 802.1X profiles only work under their own user context, and do not work for pre-login or system level network connections which are of great benefit in enterprise environments for remote management and control when users are away from their desks (e.g. overnight). Finally, it should be noted that the "auto-detection" capability during network join may not work accurately for EAP-TTLS since it assumes use of MSCHAPv2 inner authentication.
To create an 802.1X profile for Lion, download and install the iPCU:
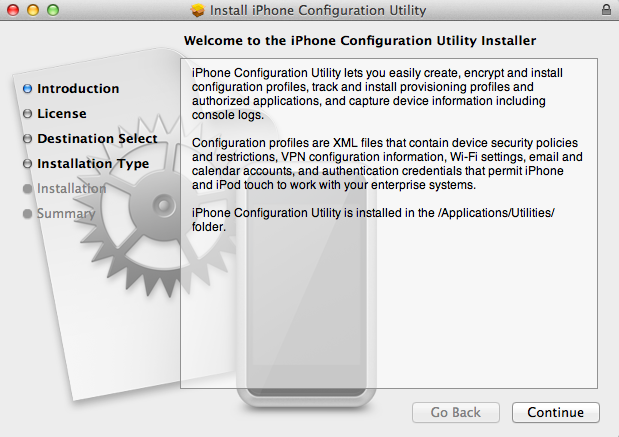 |
| Install the iPhone Configuration Utility |
Once installed, launch it from the Applications/Utilities folder in Finder. Start by selecting Configuration Profiles on the left side, then click New.
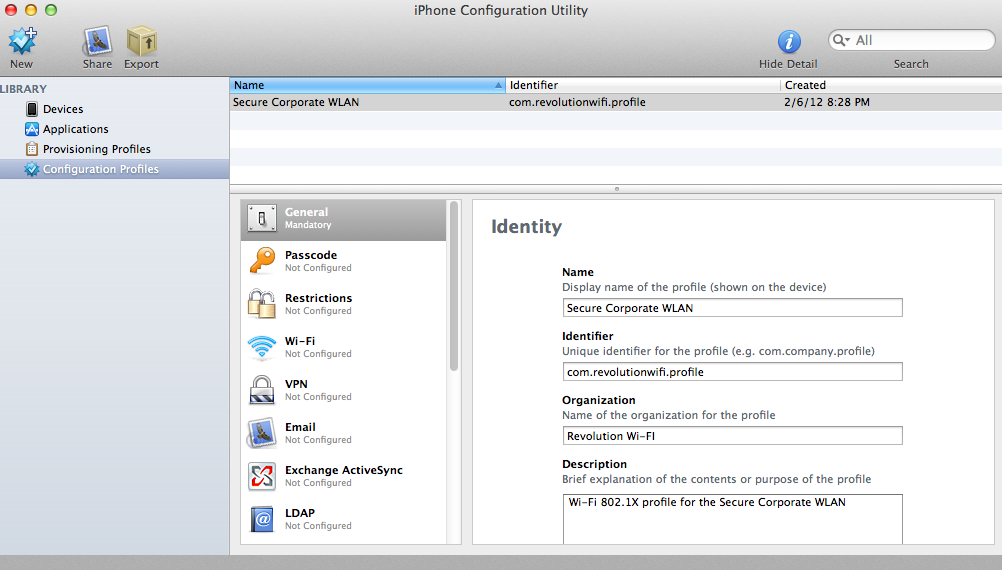 |
| Create A New Configuration Profile in the iPhone Configuration Utility |
Give the profile a name, unique identifier, organization name, and description. Then move on to the Wi-Fi section. Configure the basics like SSID and Security Type, then select one or multiple EAP types supported on the WLAN in the Protocols tab.

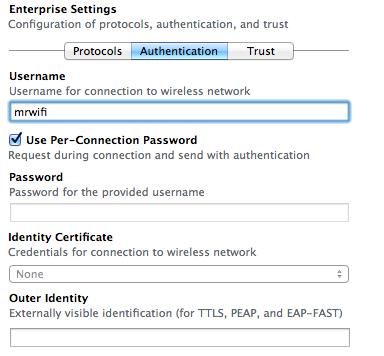
Switch to the Authentication tab to configure the credentials that will be used. Most enterprise admins will want to leave the username blank and select "Use Per-Connection Password" when deploying configuration profiles to their users to prompt each user to enter their own unique password instead of hardcoding a username and password. If using EAP-TLS an identity certificate may be selected. Finally, if you are concerned about username exposure with tunneled authentication protocols, provide an anonymous outer identity value so hackers cannot compile a list of valid usernames on your network.
 |
| iPhone Configuration Utility Wi-Fi Authentication Parameters |
Last, configure the trusted certificates and server certificate names in the trust tab. This allows administrators to define which authentication servers or naming conventions are allowed to authenticate users. This also prevents users from being prompted to trust servers at the time of authentication.
When the Wi-Fi payload and configuration profile is completely finished, select either Share or Export. Share allows you to send the profile via email, whereas Export allows you to export the file to your local filesystem for distribution at a later time.
Note - See this Apple help document for further instructions on using the iPCU.
To install the configuration profile, locate the file (.mobileconfig extension) and double-click it.
 |
| Install the iPCU Configuration Profile |
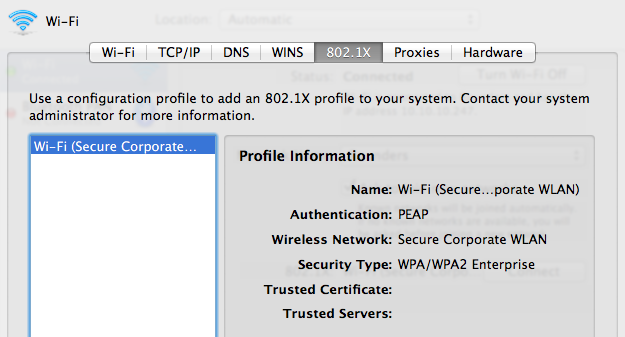
You will be prompted to fill-in any per-user authentication fields left blank by the administrator. The profiles can be viewed later in the System Preferences > Profiles section. This is also where you can delete previously installed profiles. The associated 802.1X profile is also visible in System Preferences > Network > Advanced > 802.1X.
 |
| 802.1X Profile Successfully Installed |
This method is not as easy for on-the-fly testing, but should allow administrators to accomplish all necessary tasks.