This is used when someone wants to save Outlook emails locally.
Step-by-step guide
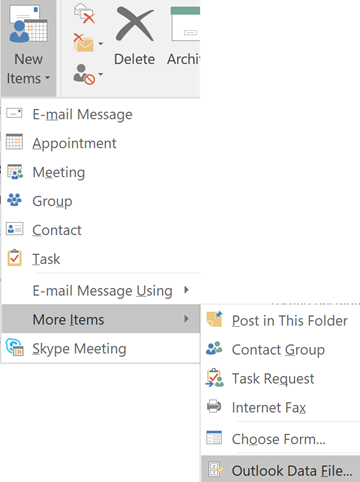
- From the Inbox, select New Items > More Items > Outlook Data File.
- Enter a File name.
- The default location for new .pst files is C:\Users\username\Documents\Outlook Files. The default file name is: My Outlook Data File.pst, but you can rename this to whatever you like.
NOTE: ITS recommends that you create .pst files in this default directory. This is important to easily locate your .pst files and is especially important if you move to a new computer and need to move a Windows profile
NOTE: Microsoft does not support .pst files being stored on a network share - Click OK.
- In Outlook, scroll to the bottom of the mailbox list in order to see your new local folder, and click the > icon to open the folder. There are two default folders in your new .pst folder -- Deleted Items and Search Folders. You can now create new sub-folders for storing mail.
- To move email to the .pst local folder, select it in the Inbox and drag and drop to the local folder. You can move a single email, a group of emails, or even an entire mailbox. Note that the more items you select in a single batch, the longer it will take to process.